IKEA PAX wardrobe hack – Apartment Apothecary
Salvation! I was away from the blog for the entire 3.0 lockdown and really missed it. I also have a whole bunch of comments / questions to catch up on; I’m so sorry if you left me a comment and I haven’t replied yet, I’ll try to catch up asap but there are a lot of them so you will have to put up with me. Don’t forget to use my search tool as a lot of the questions asked are answered elsewhere on the blog i.e. paint colors. Also, go to my Instagram because there are a lot of highlights and information out there too.
During the lockdown I had Mimi at home full time so work took a secondary place (very, very lucky for us to be able to be flexible when it comes to the amount of work I do). For many afternoons at home I managed to do a bit of DIY and painting around the house so I have a lot to share with you over the next few weeks but first and foremost like promised about six months ago, I want to Share our IKEA PAX wardrobe tip!
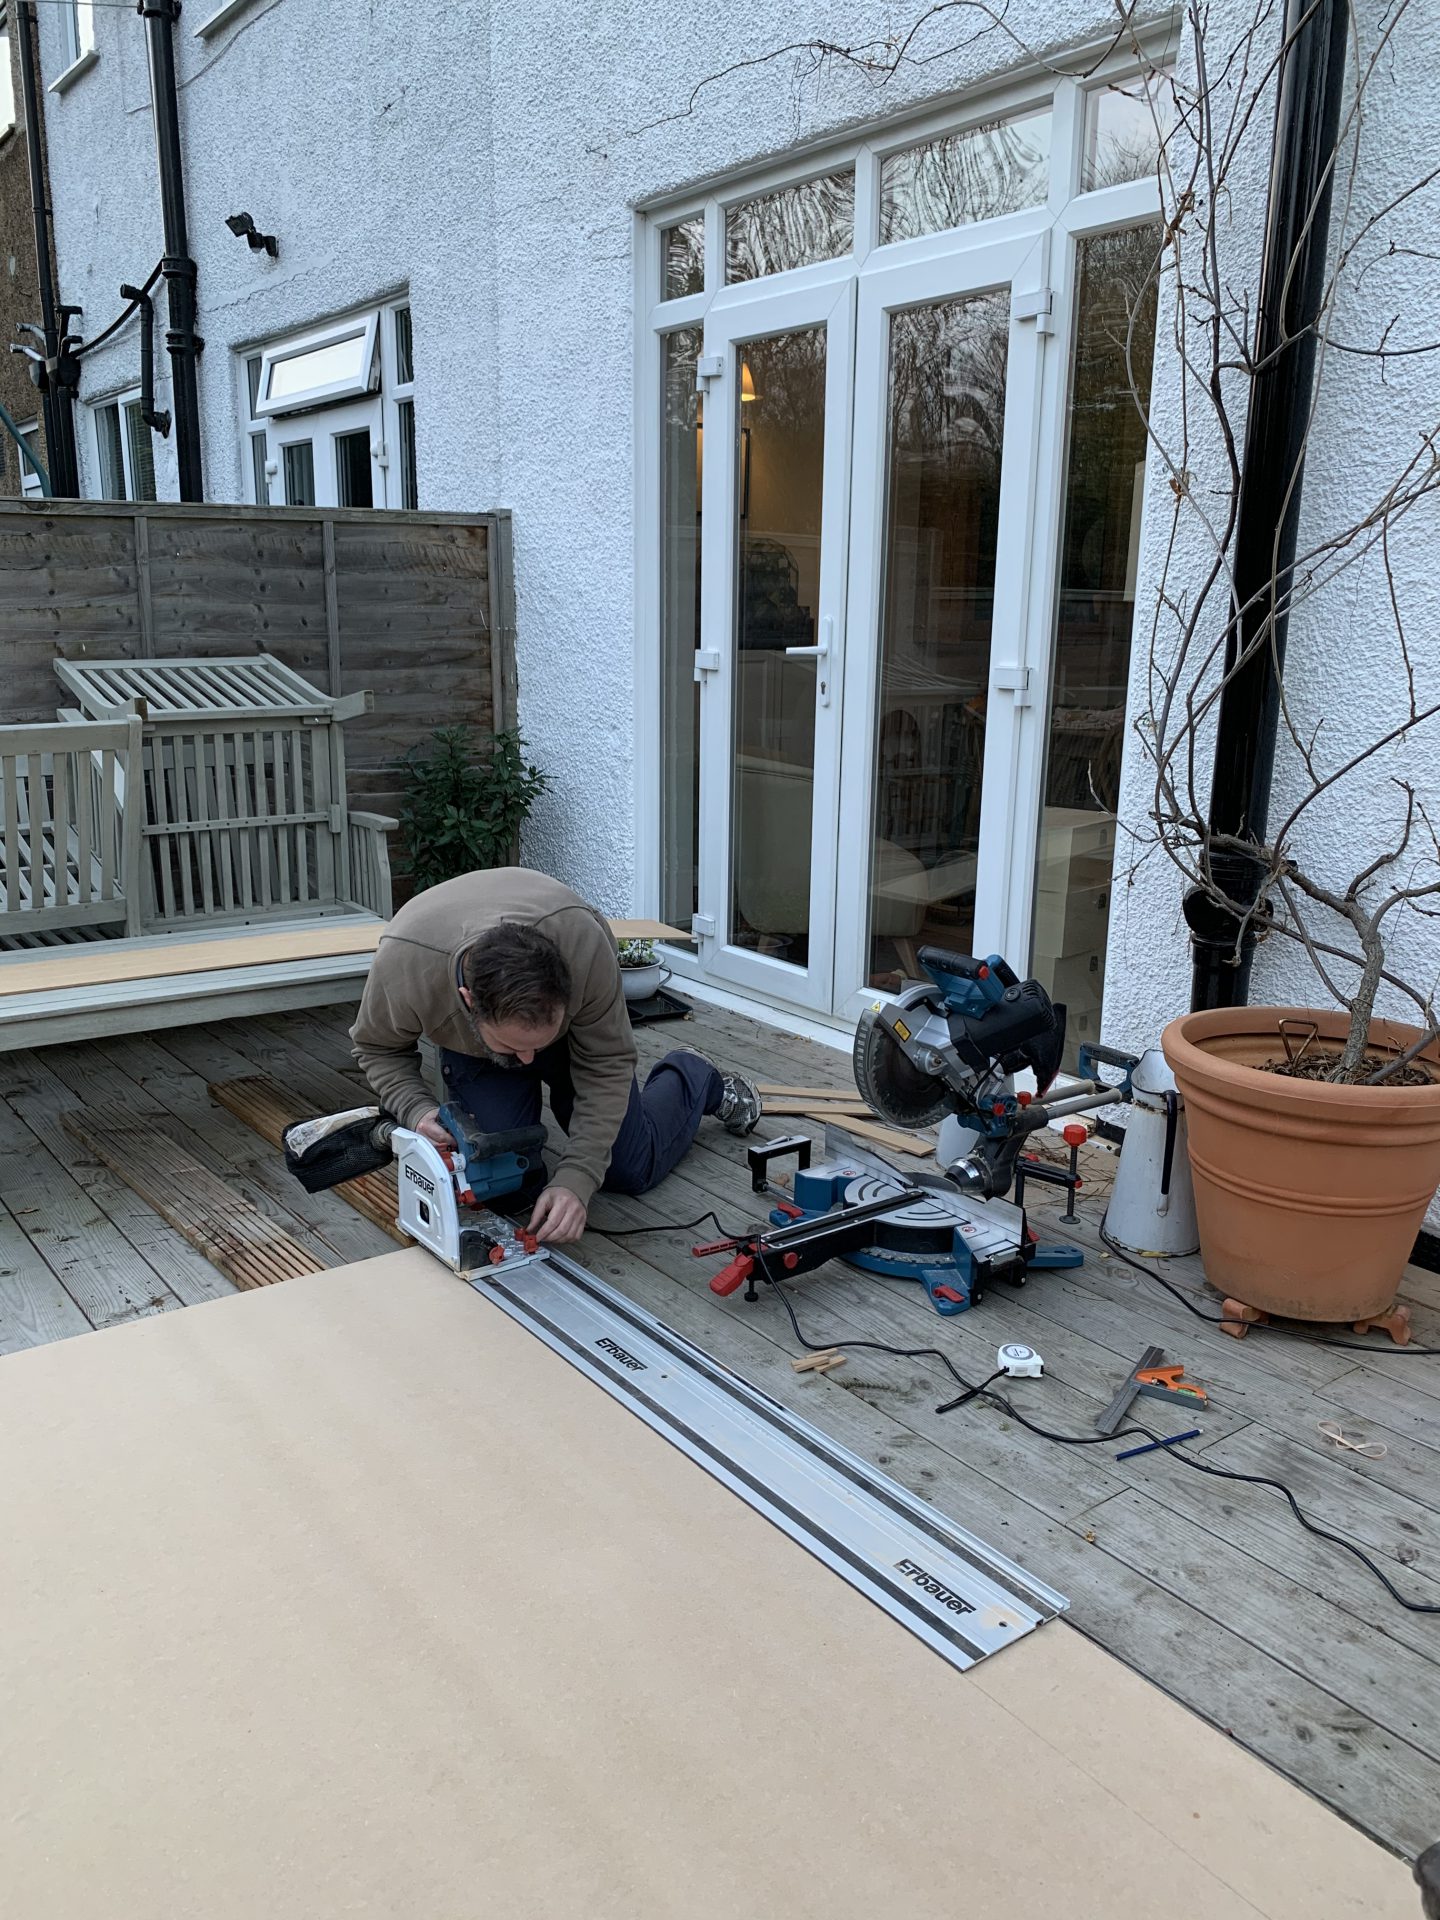
The hack took three solid weekends and it’s still unpainted, but we’re so thrilled with the results and saved around £ 2000 doing it on our own (we had some quotes for custom cabinets with drawers / internal shelves / hanging space and they were all around £ 3000). Would we do it again? Yes. Was it hard work? Yes. Did we learn a lot along the way that would make the next time easier? For sure. In fact, one of the hardest things about the project was not really knowing what we were doing as it’s pretty hard to find instructions online, so I hope this blog post helps those in. between you who want to tackle piracy.

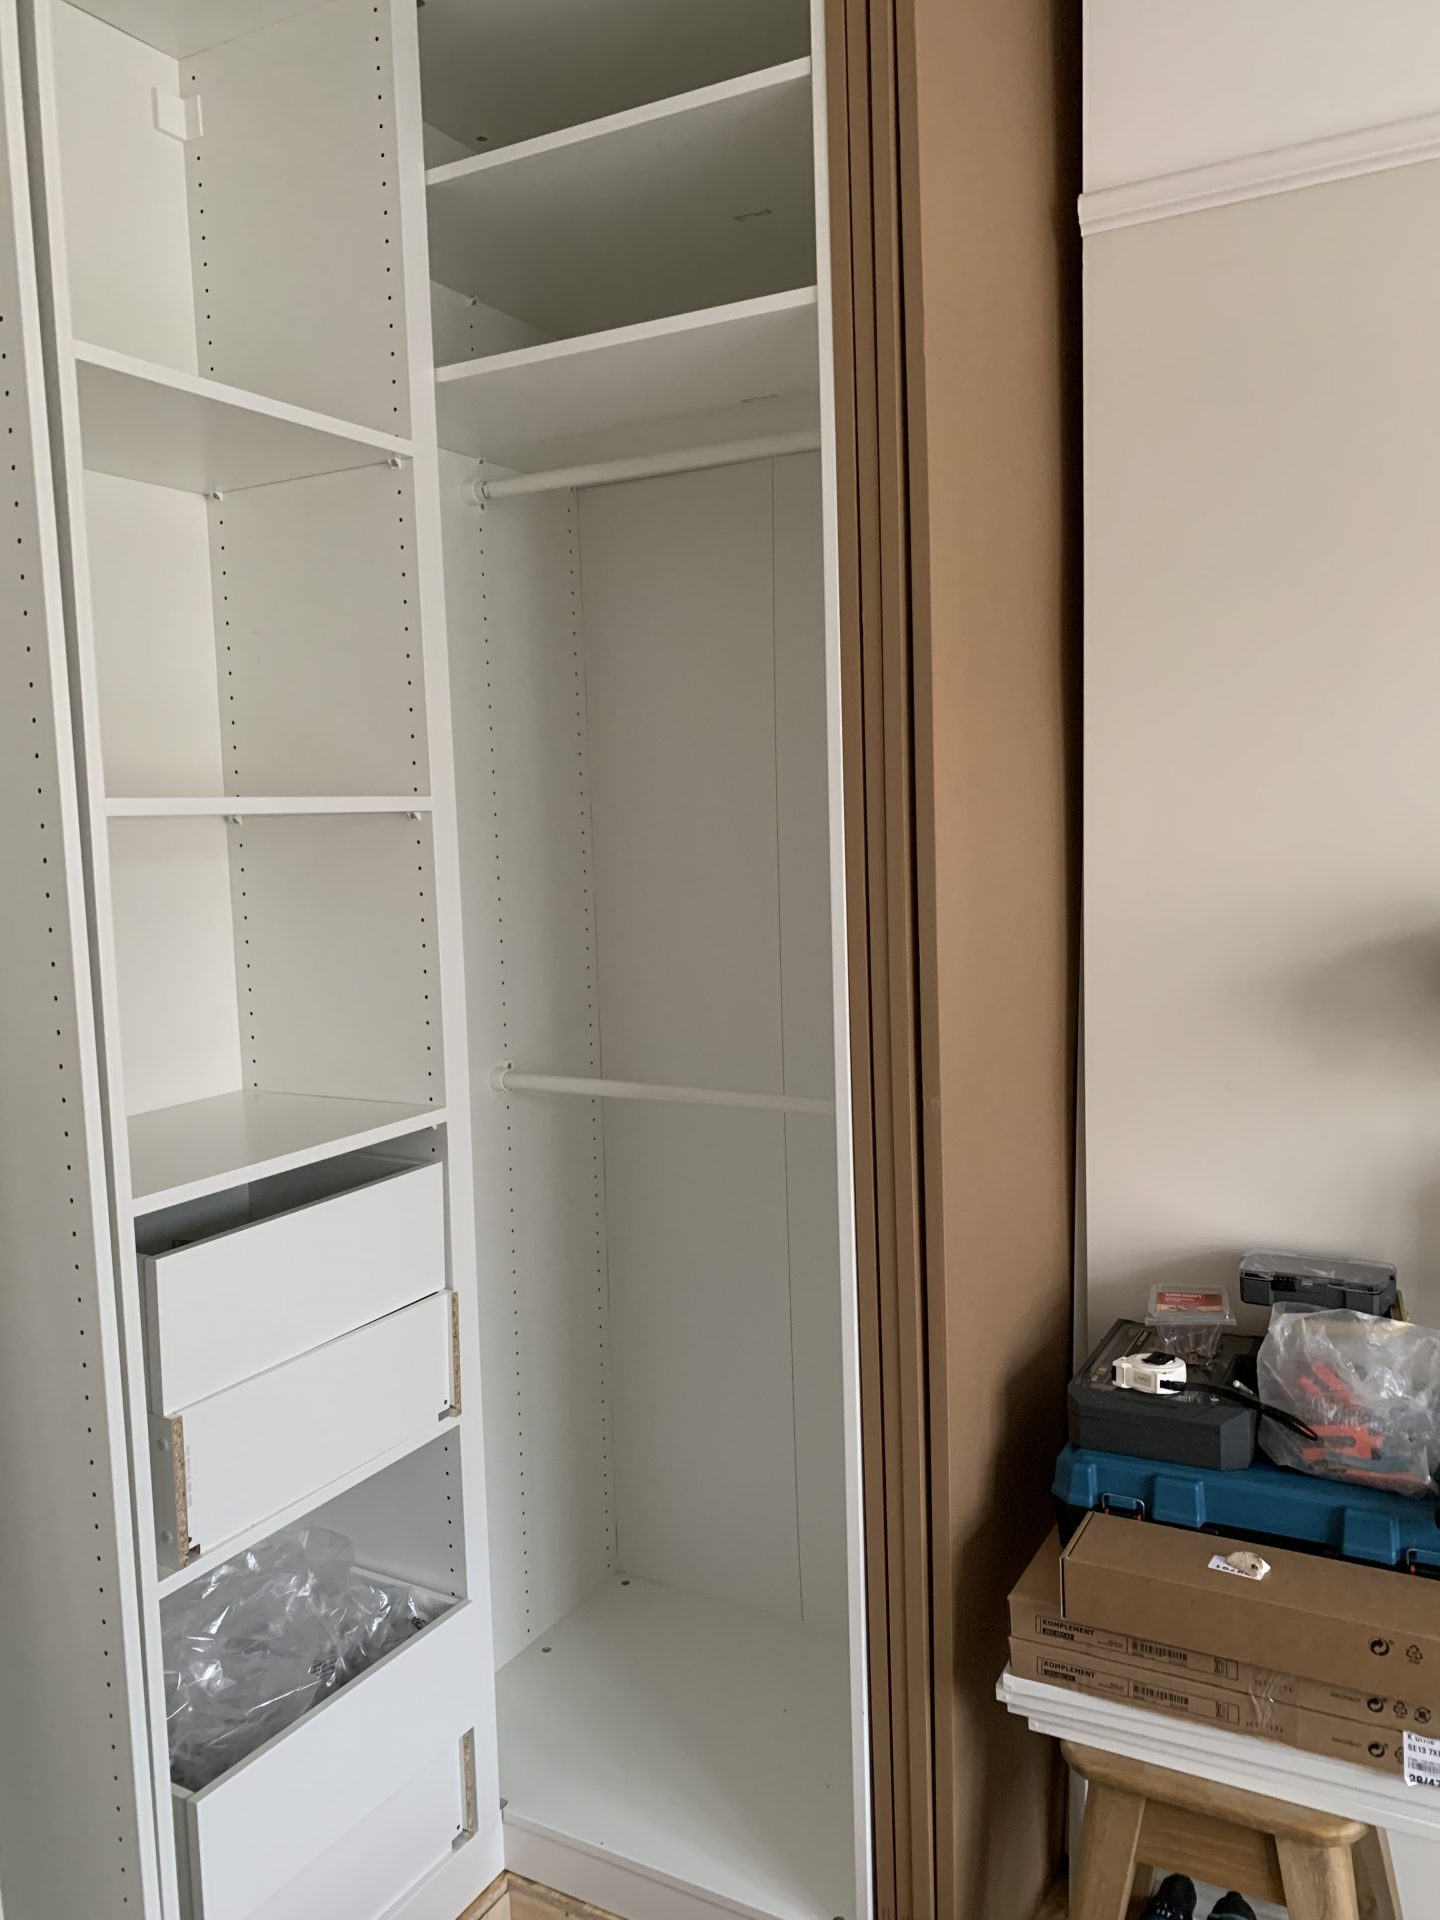
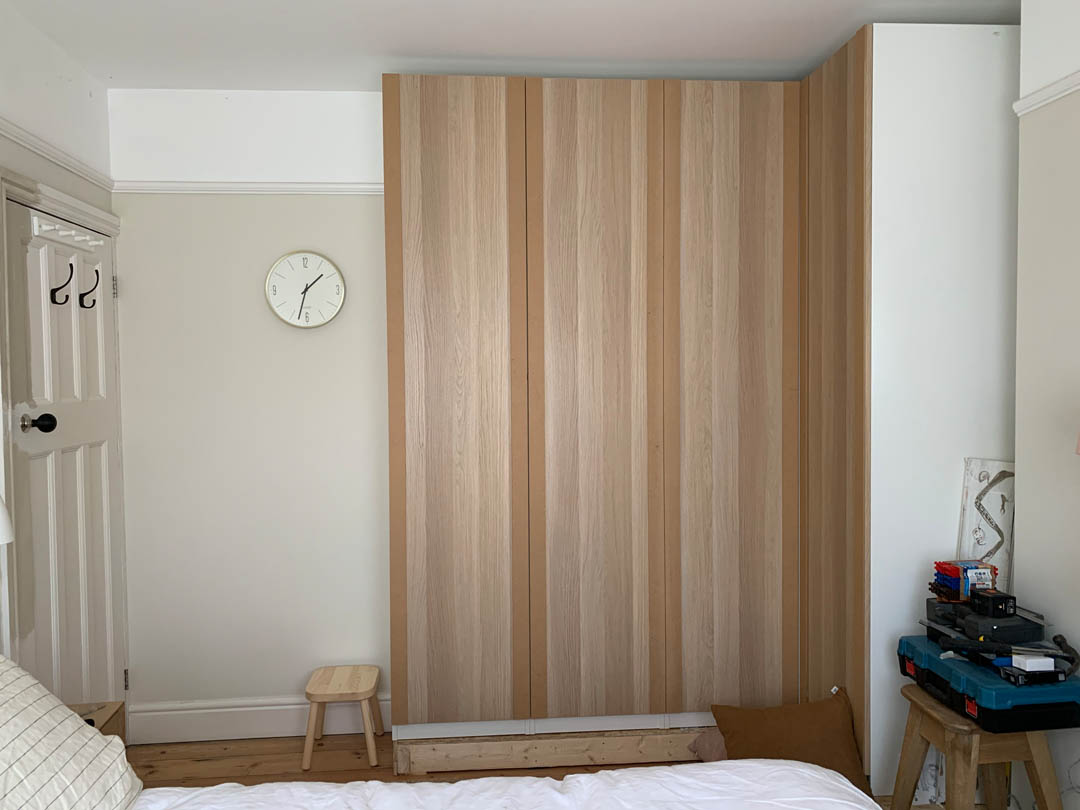
First off, let me tell you what items we bought from IKEA. For the right bedroom alcove, we chose a wardrobe frame 100cm wide – 236cm high – 35cm deep. The alcove is approximately 105cm wide but the walls are not straight, so in some places it is 103cm and in others, 106cm. In our room, the 35cm deep frame was the only option as there is relatively little space between the wardrobe and the end of the bed, so the 23cm deep frame would have been way too close to the bed. We also had to make the decision to place the frame off-center in the alcove as we wanted hinged doors (not sliding doors, which is the other option) and if the frame was centered the right door wouldn’t have fitted. open properly against the radiator. under the window and the curtain rod – think very carefully about what your doors will open to because they must be able to open fully, especially if you are installing drawers inside the cabinet.
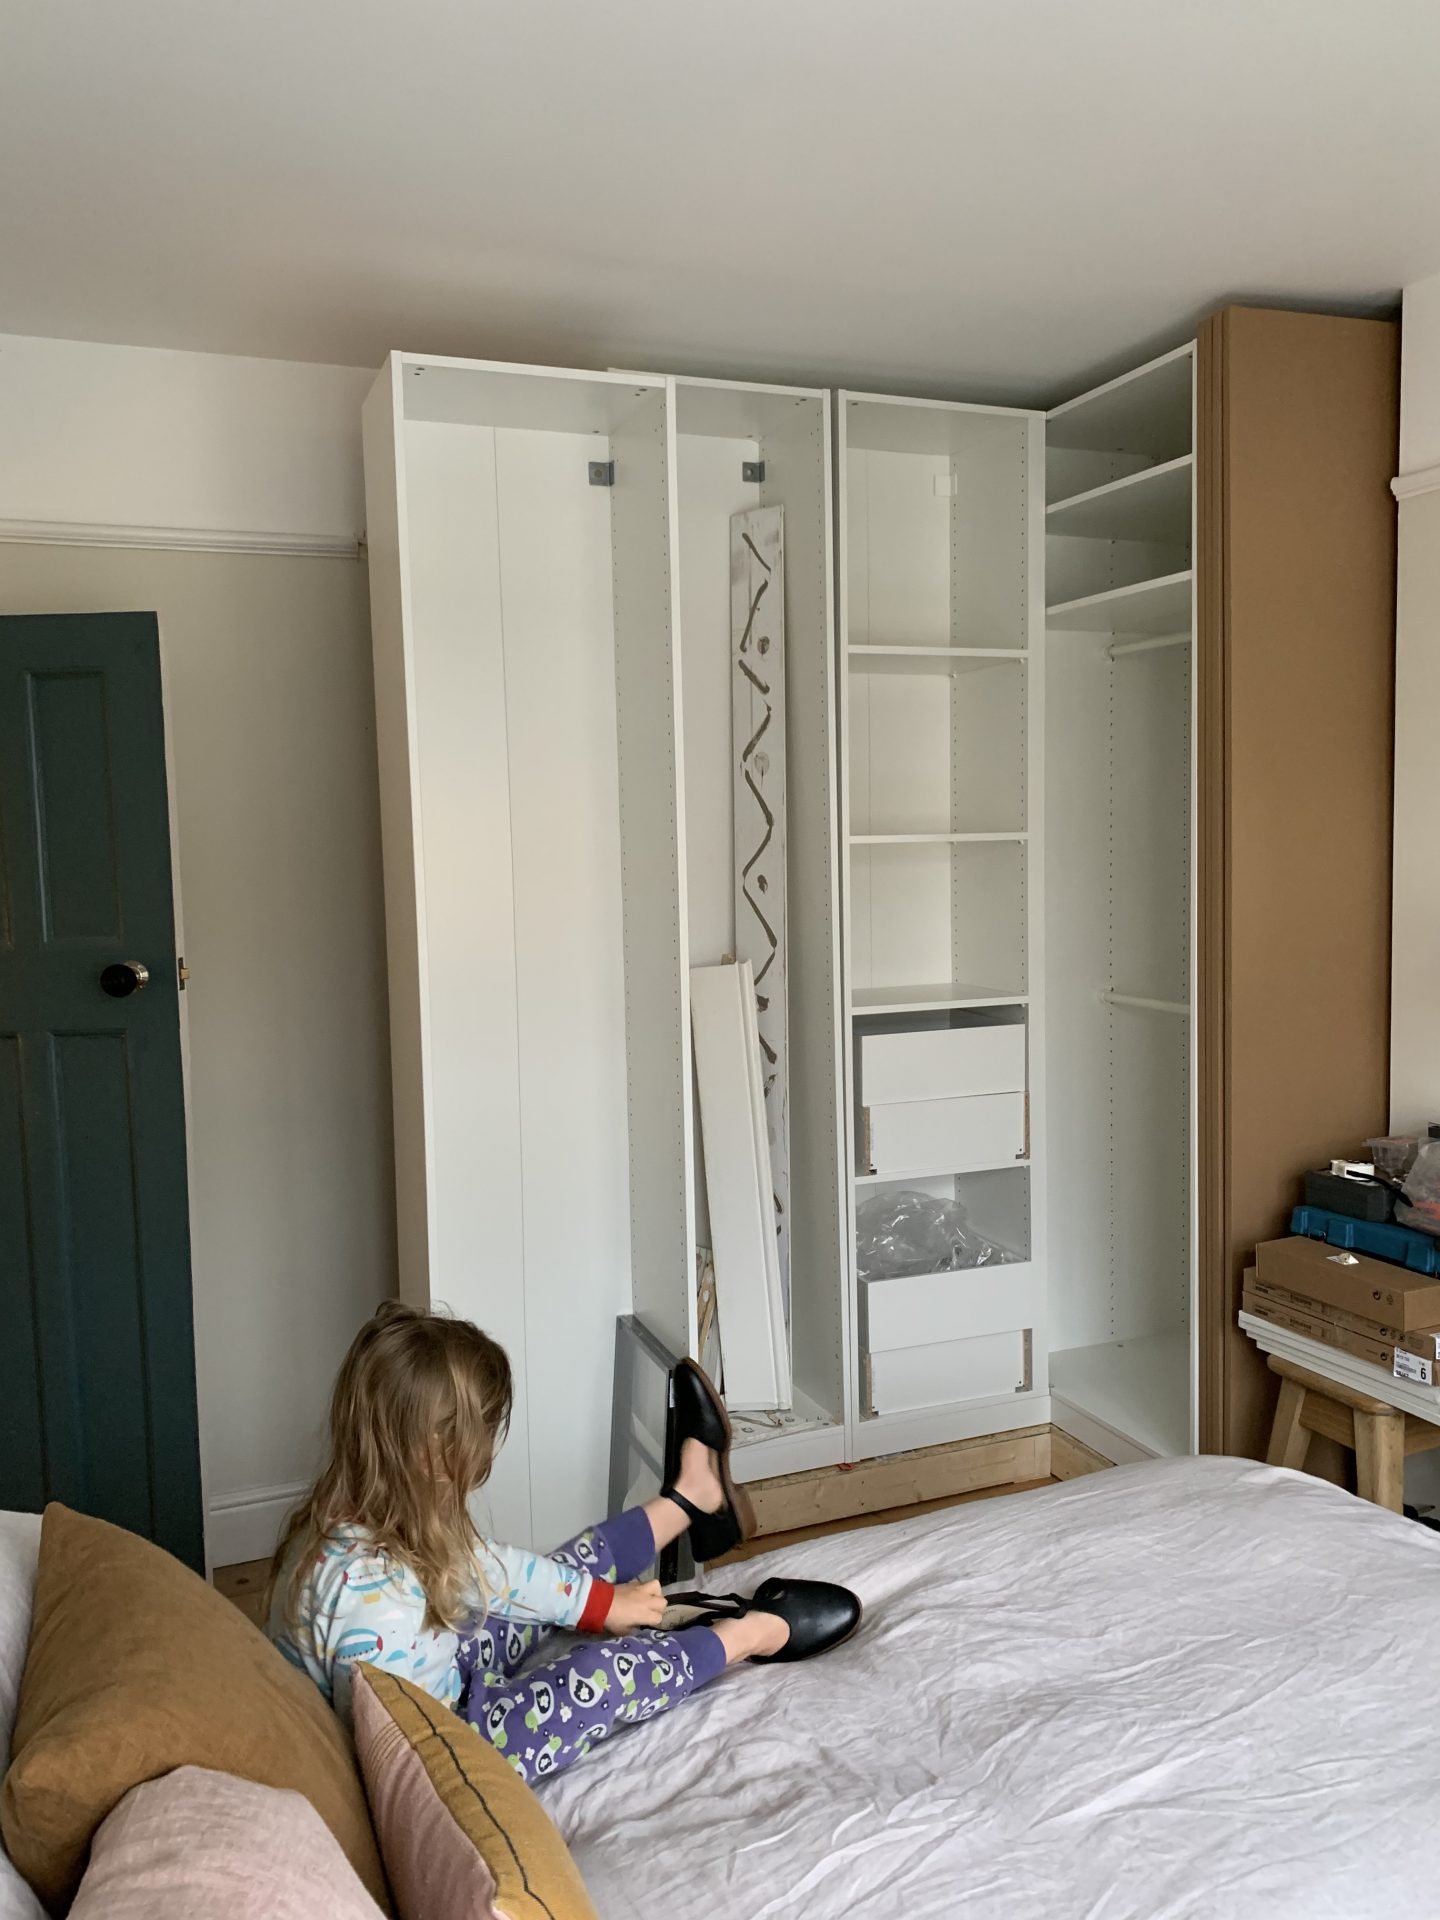
For the left alcove, which also measures around 105cm, we decided to extend the wardrobe around the corner and along the left side wall of the bedroom. With this type of configuration it is not possible with the PAX system to use a 100cm wide frame to enter the alcove, it must be a 75cm frame as it can be connected to the corner fixing and allows the installation of a door of 50 cm. The cabinets that run along the left side wall need to be 35cm deep to accommodate this setup and that suited us just fine, as if they had been deeper they would have eaten up the little floor space we have way too much and opening the doors again would have been a struggle. However, we were able to have a 23 ” deep frame in the alcove as there is enough space on that side of the room for the doors to open without hitting the bed.
The corner unit is set up like this – the frame on the right side is 75cm wide and 58cm deep and the one on the left is 50cm wide and 35cm deep:
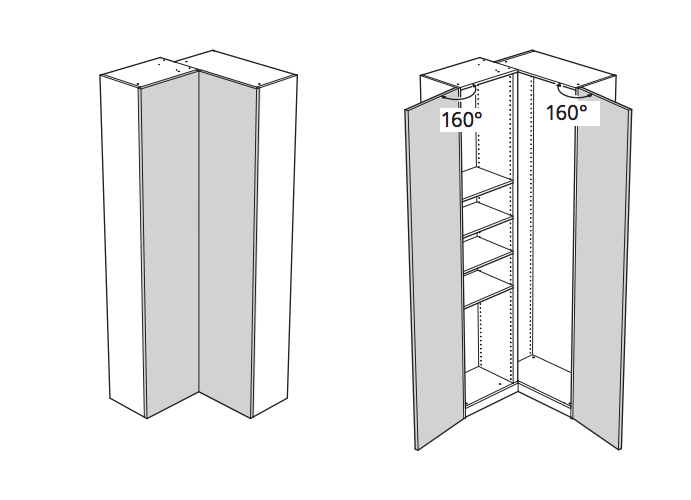
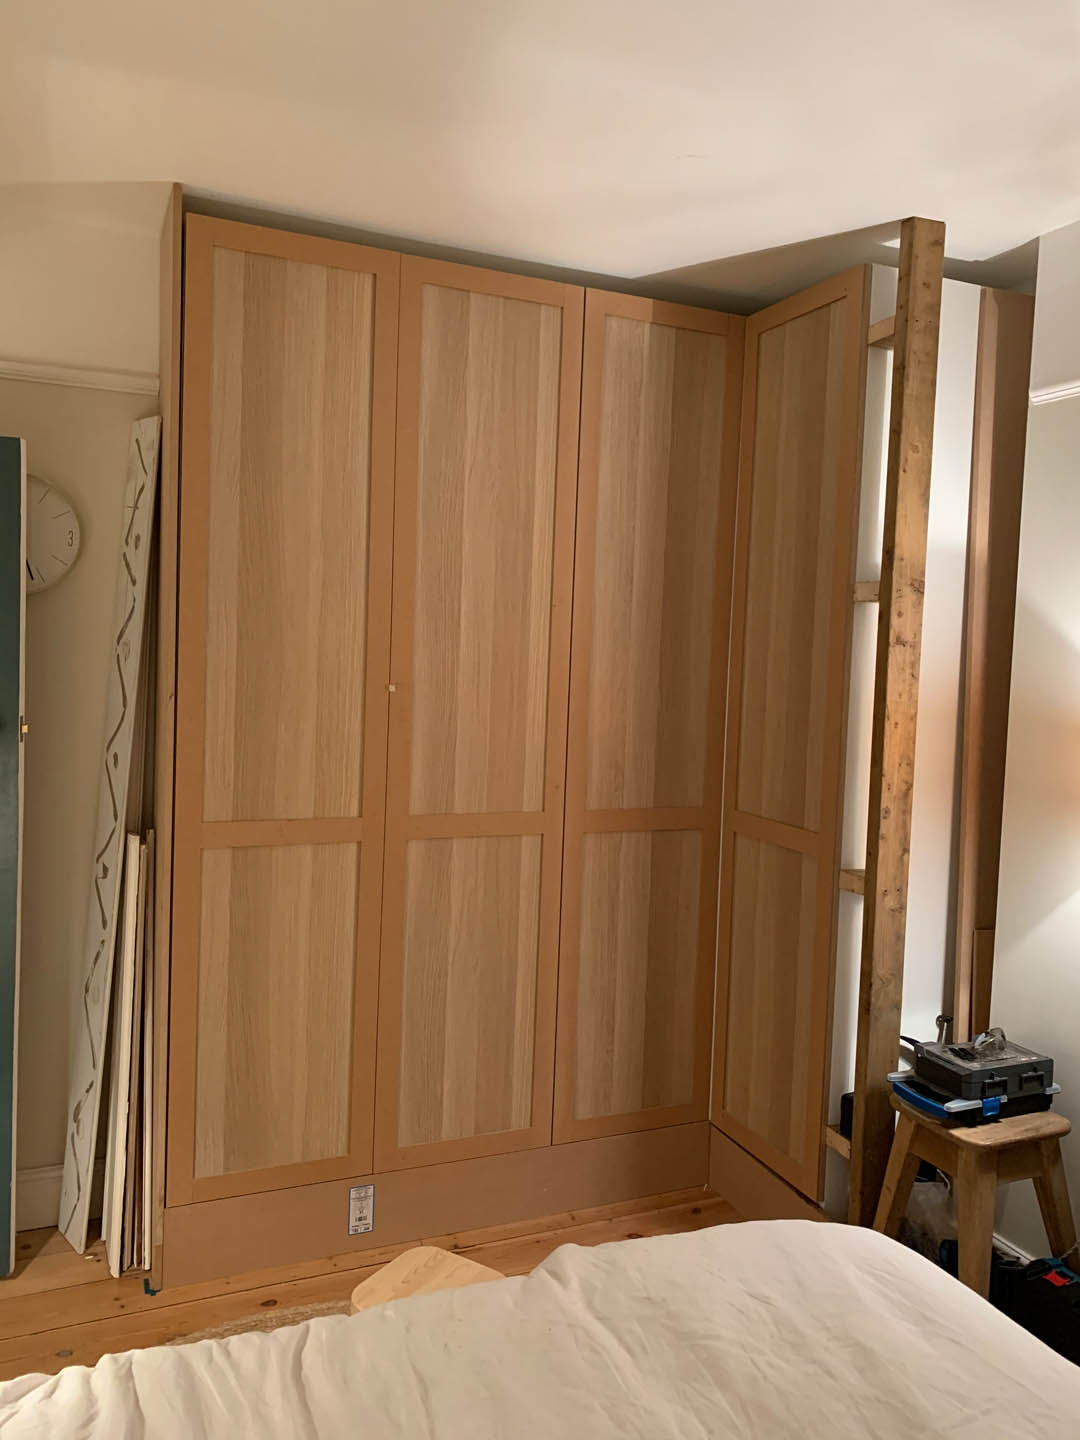
The effect for us of having this corner unit was that the cabinet frame was only 75cm wide, the frame had to sit 13cm from the left wall and that left 15cm space on the right side of the alcove. It was the big compromise for us and would make boxing a must.
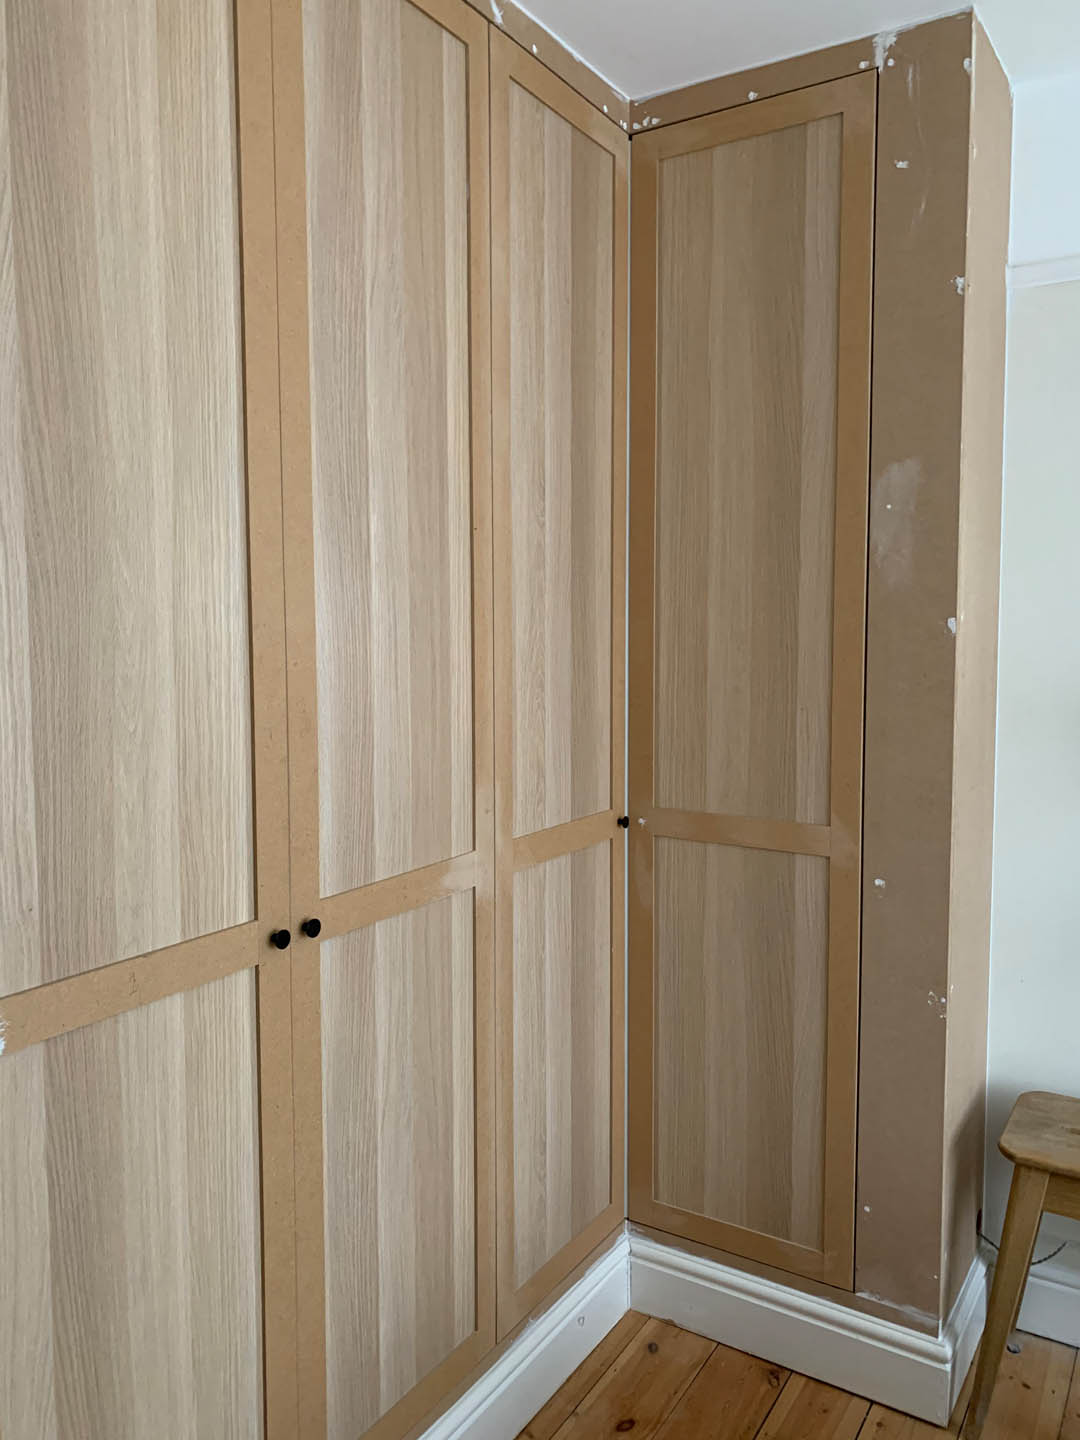
As you can see by now, there was nothing symmetrical about the two sets of wardrobes – one was off-center, the other deeper and with a lot of space – so boxing would really help make the closets look bigger. consistent.
What we bought:
Right cabinet
Frame 100x35x236cm £ 60
x2 Forsand doors in white stained oak £ 60
Left cabinet
Frame 75x58x236cm £ 60
Complementary corner frame 53x35x236cm with 4 shelves £ 135
Frames 50x35x236cm x2 £ 80
x4 Forsand doors in white stained oak £ 120
(I’ll tell you more about the interior of the cabinets and the overall cost in my next post)
Materials we purchased
Basic wood
x2 18 mm MDF sheets for boxing
x1 sheet of MDF of 6 mm to personalize the door fronts
Necessary tools
Rail saw
Drill screwdriver and impact driver
Laser level
Multi-function tool
Nailer
Instructions
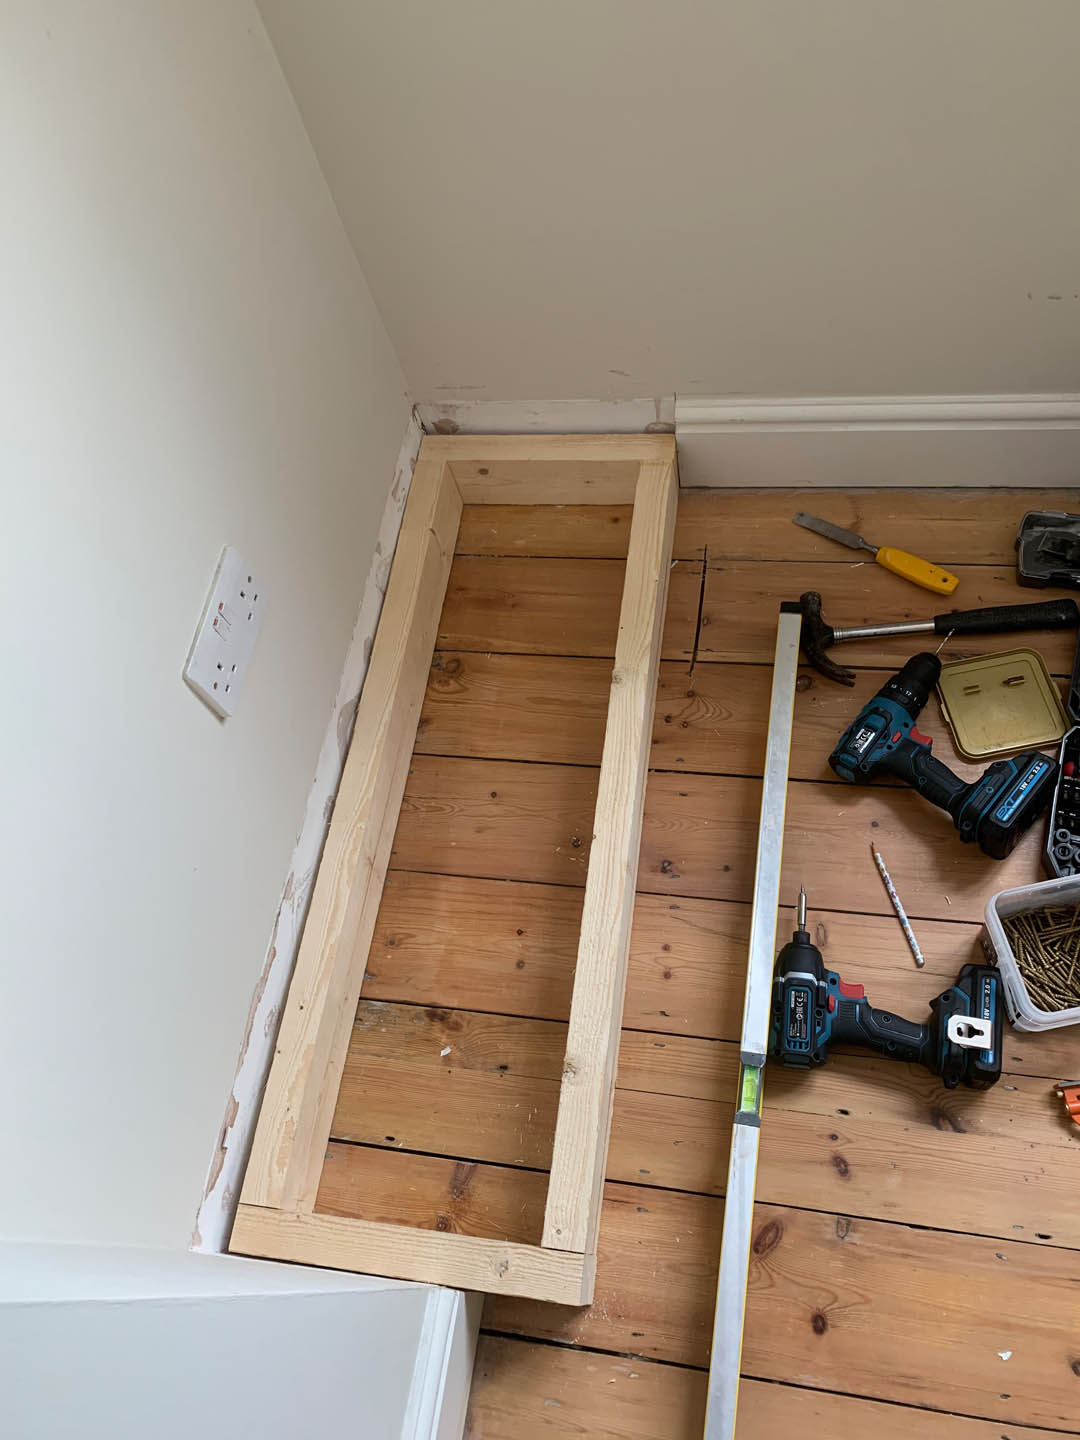
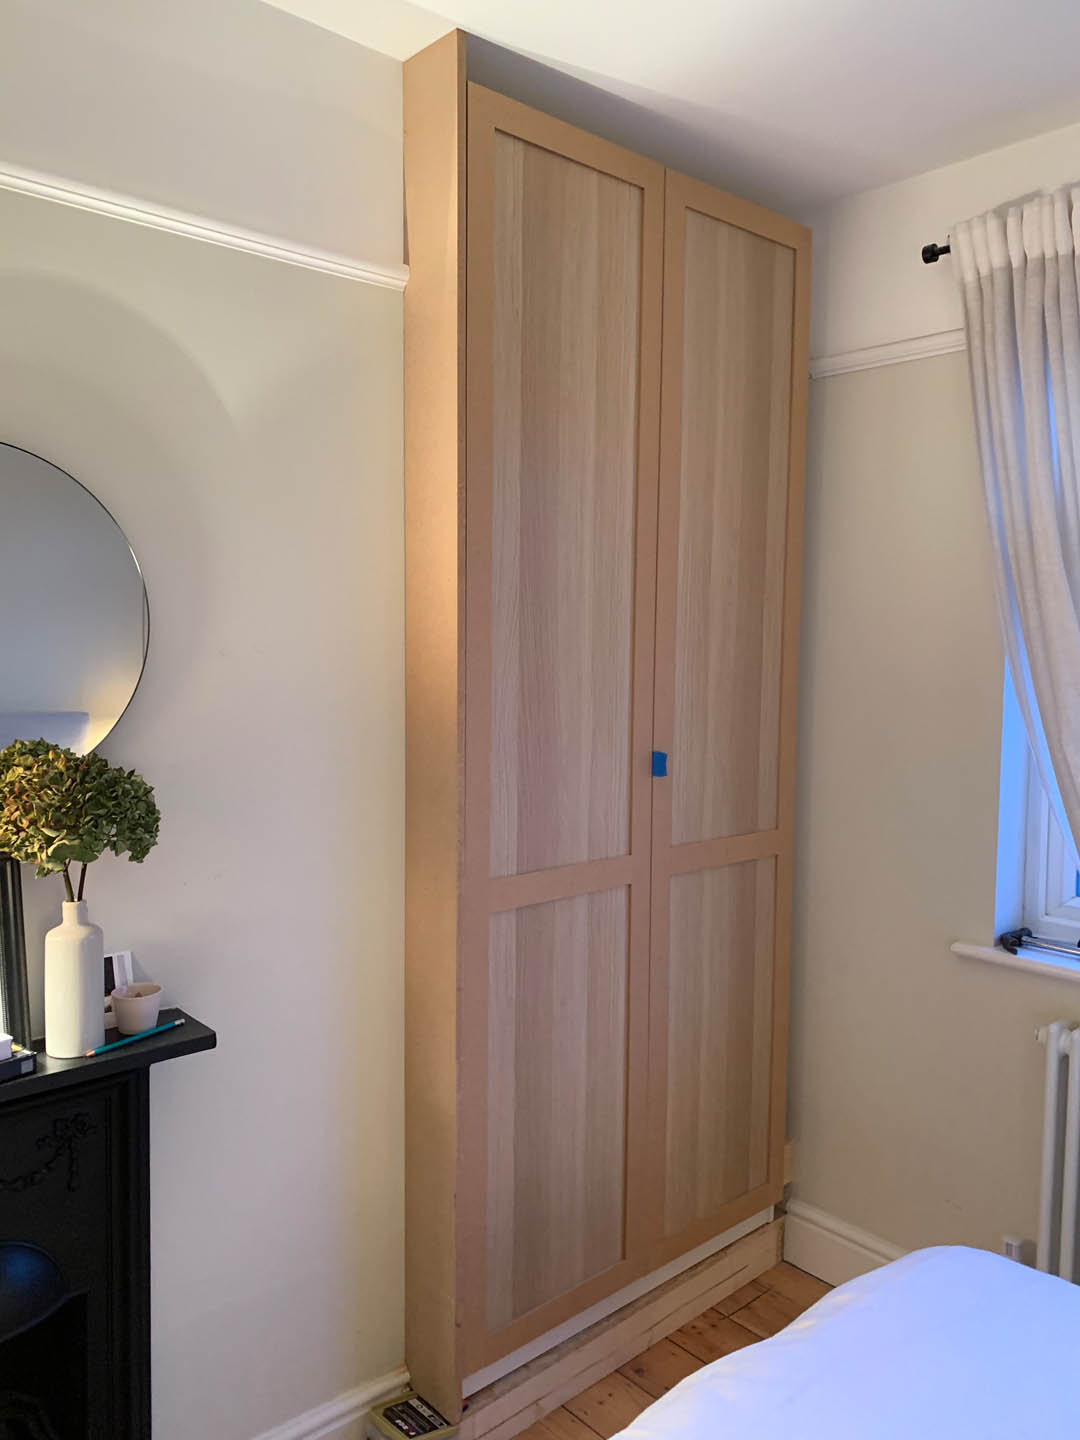
- Remove the plinth with a multi-tool and build a base for each set of cabinets the same depth as your cabinet frame (so the door overhangs the base). Make sure it is level using scrap wood to adjust the level if necessary.
2. Build the cabinet frames following the IKEA instructions and place them on top of the base and secure them to the walls.
Customization of door facades
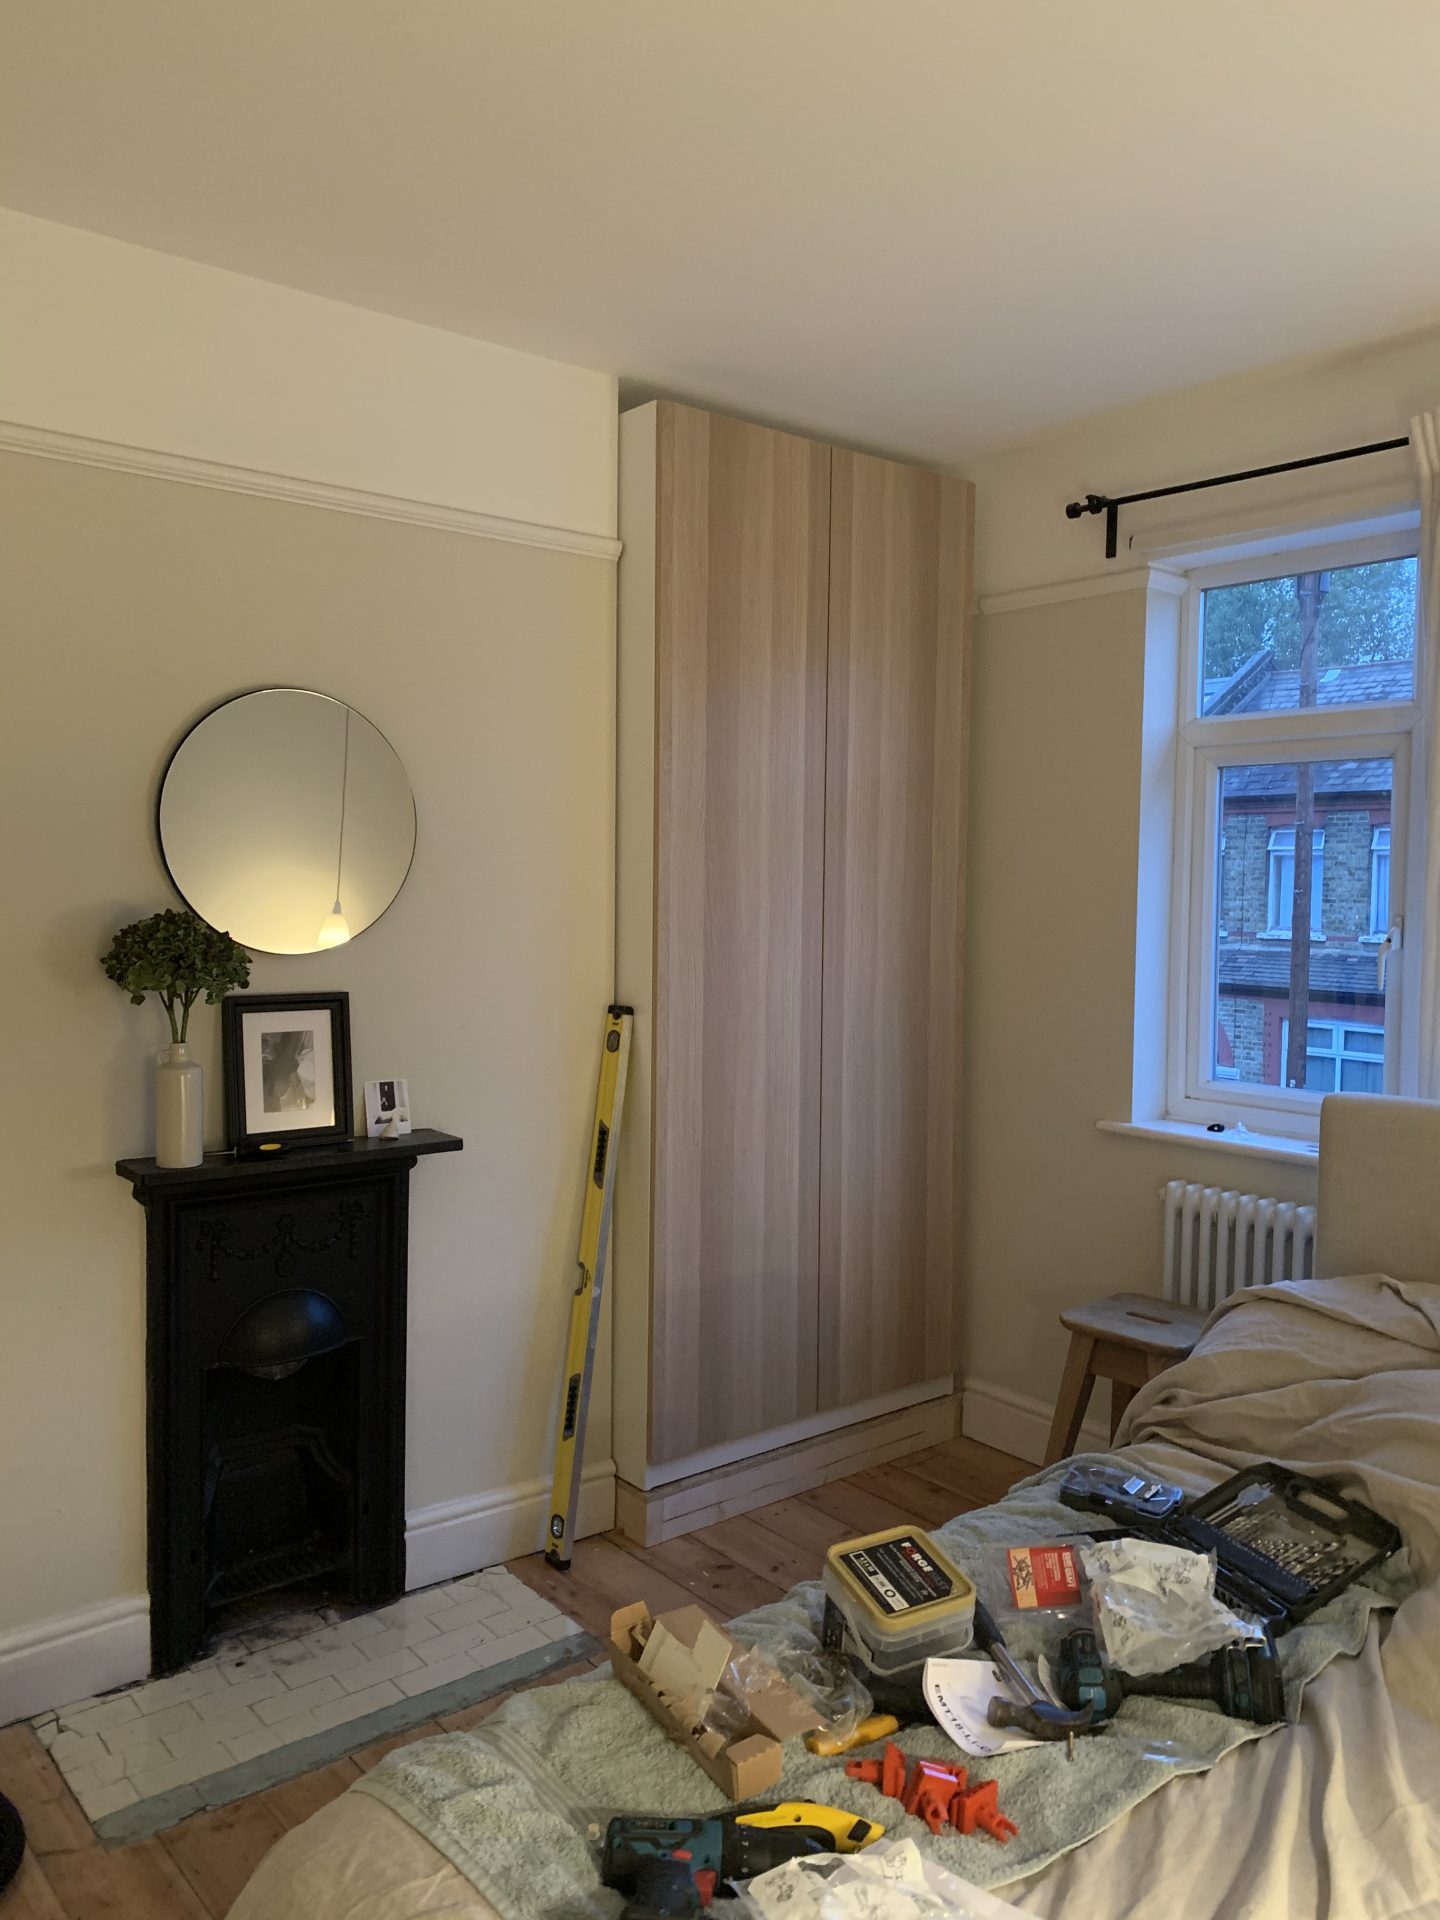
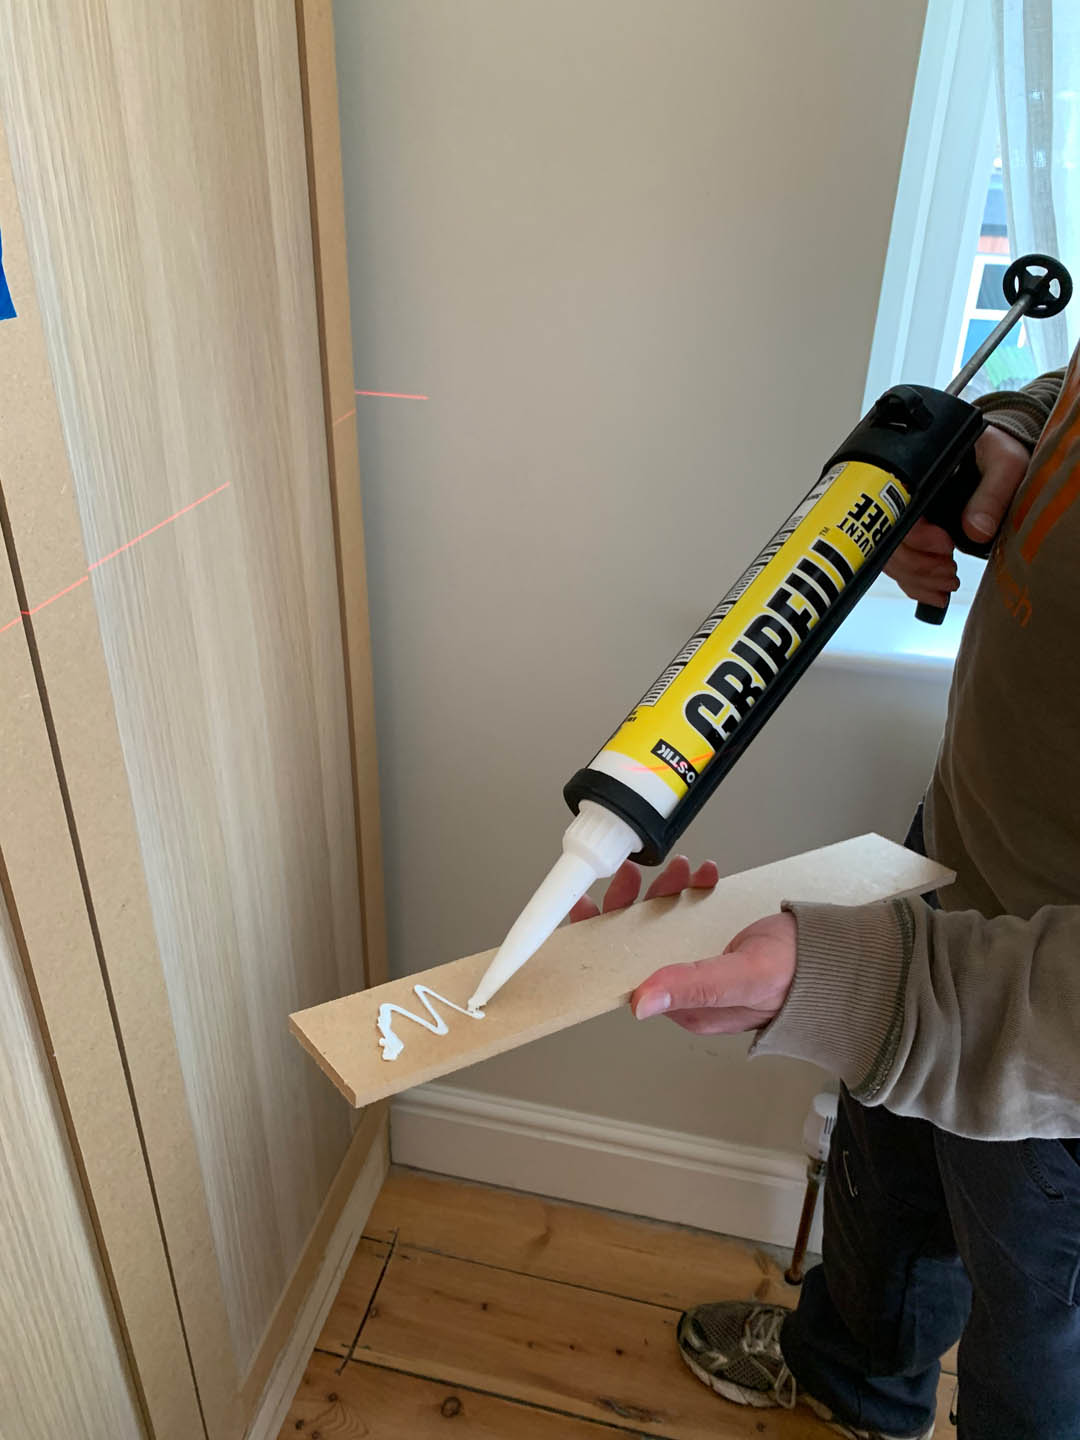
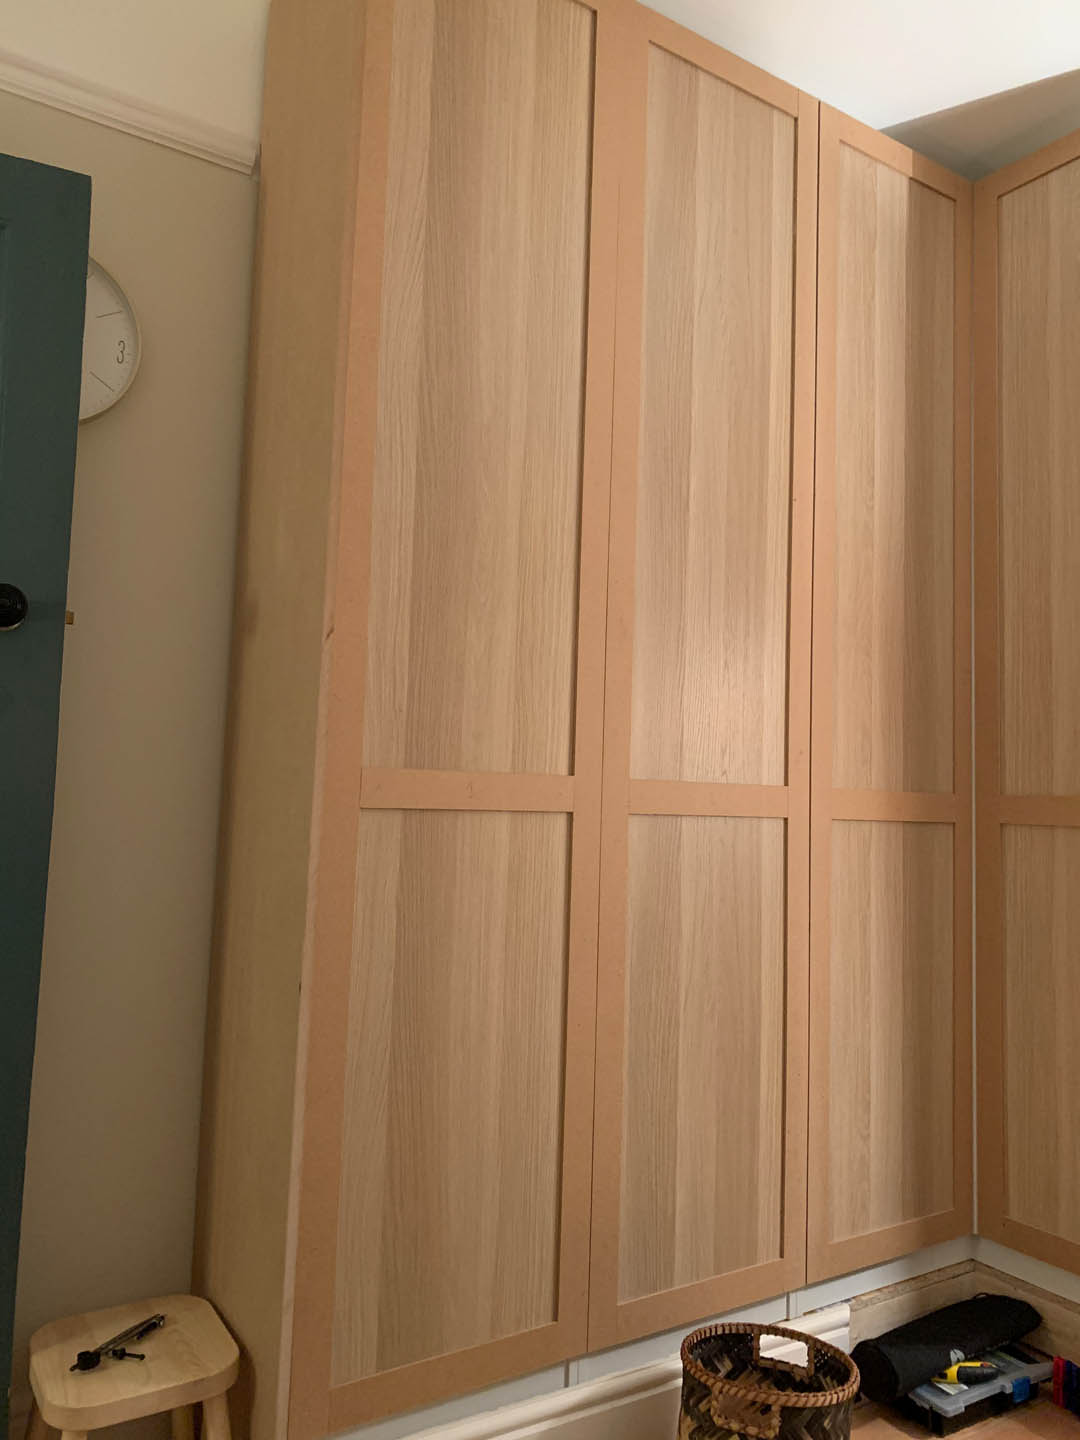
Ideally, we would not have customized the door facades, but we were only able to obtain Forsand Doors, which have a flat face and not the finish we wanted. Therefore, our only option was to customize the facades, which added many working to process. Without playing with the doors, the whole hack project would have been so much easier. We decided to add MDF strips to create the look of the panels and got 6mm MDF strips cut to 55mm by B&Q.
3. We used masking tape to decide the width of our MDF strips to be cut by B&Q. Sorry for that photo – it’s the only one I took! We ended up going with 55mm bands after taking into account the shadow effect of the bands by making them appear slightly wider.
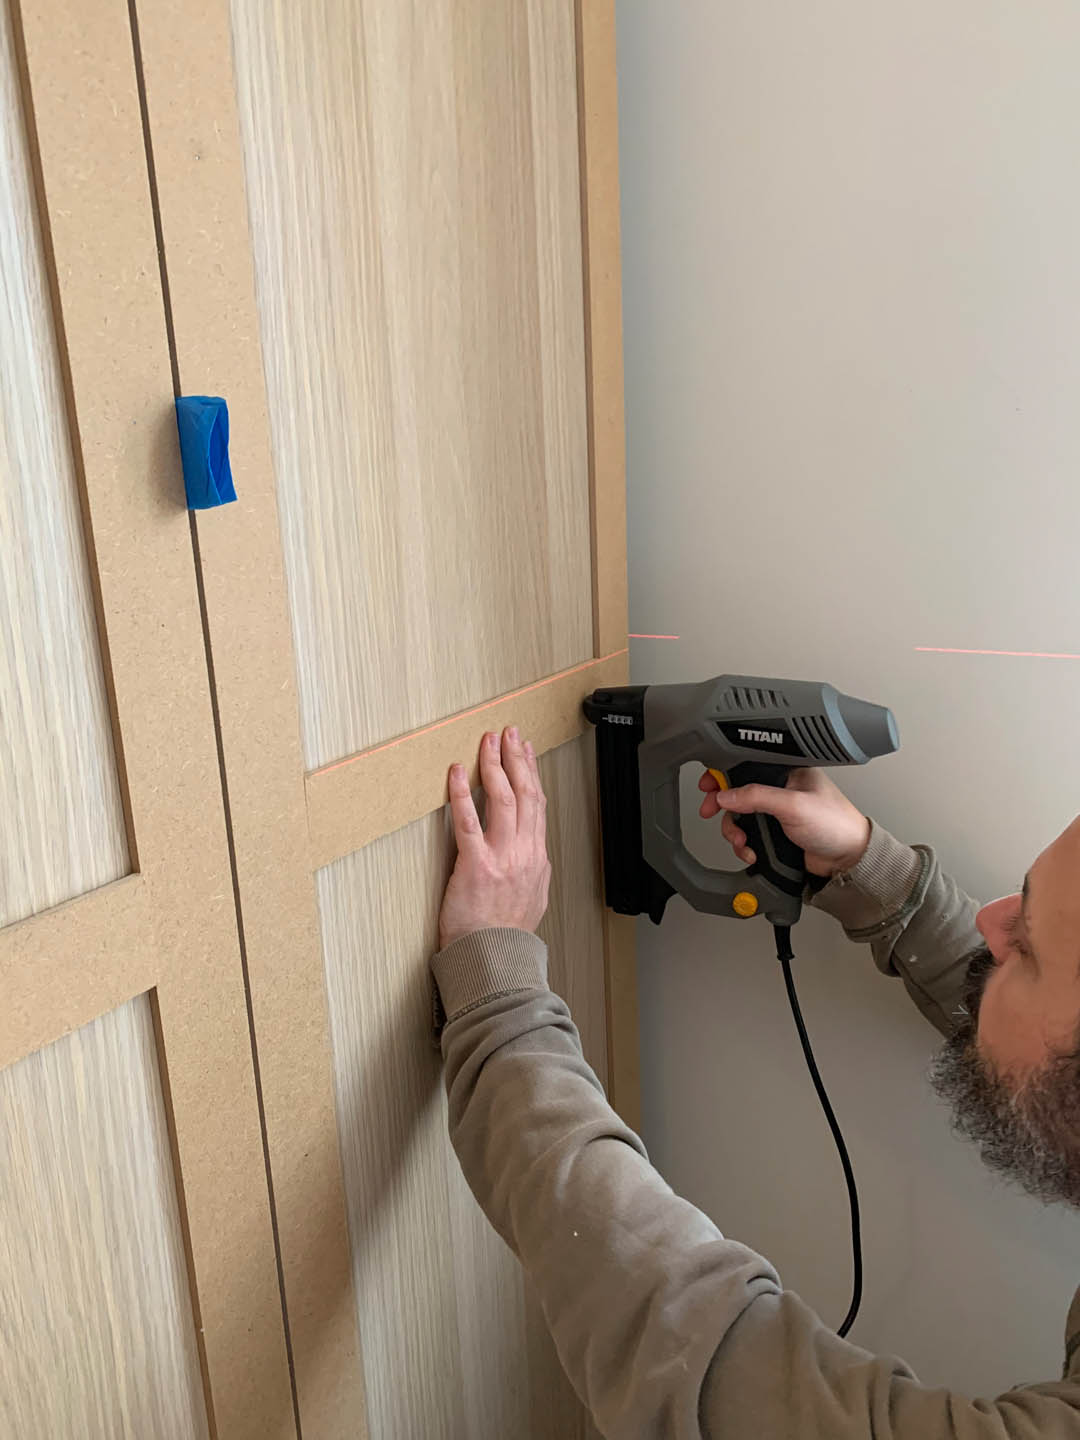
4. We first used glue and nails to attach the vertical strips to the doors. We cut them to length using a miter saw and made sure the rough edges were sanded.
5. We used a laser level to place the horizontal bands and we decided to place them one third of the height of the cabinet.

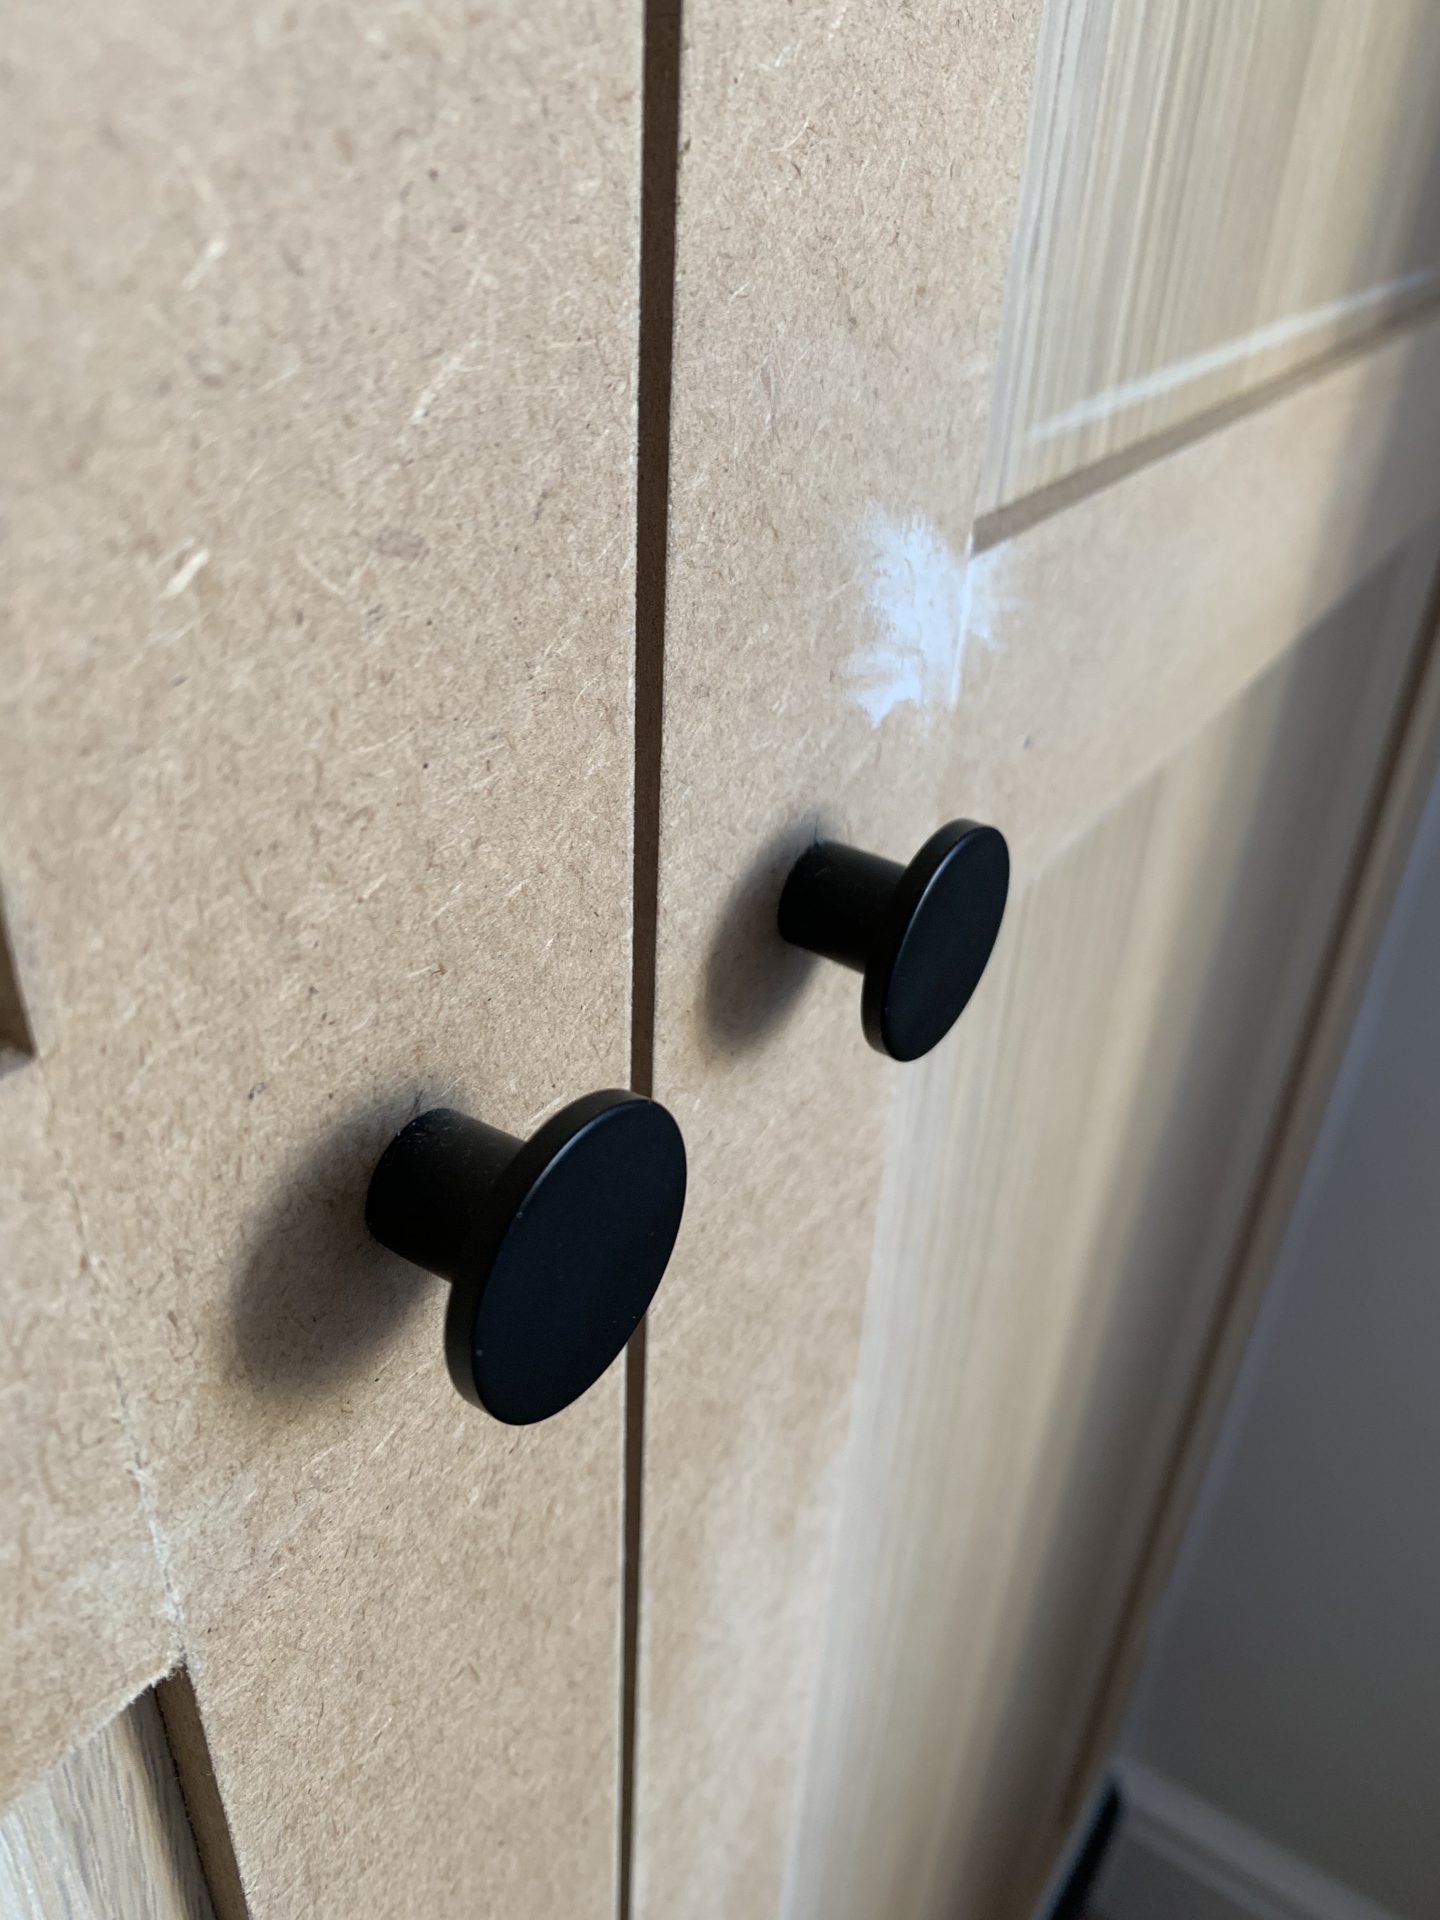
6. We added handles, but since the MDF strips added 6mm of depth to the doors, the handle bolts were too short. Therefore, we had to evacuate them through the back of the door.

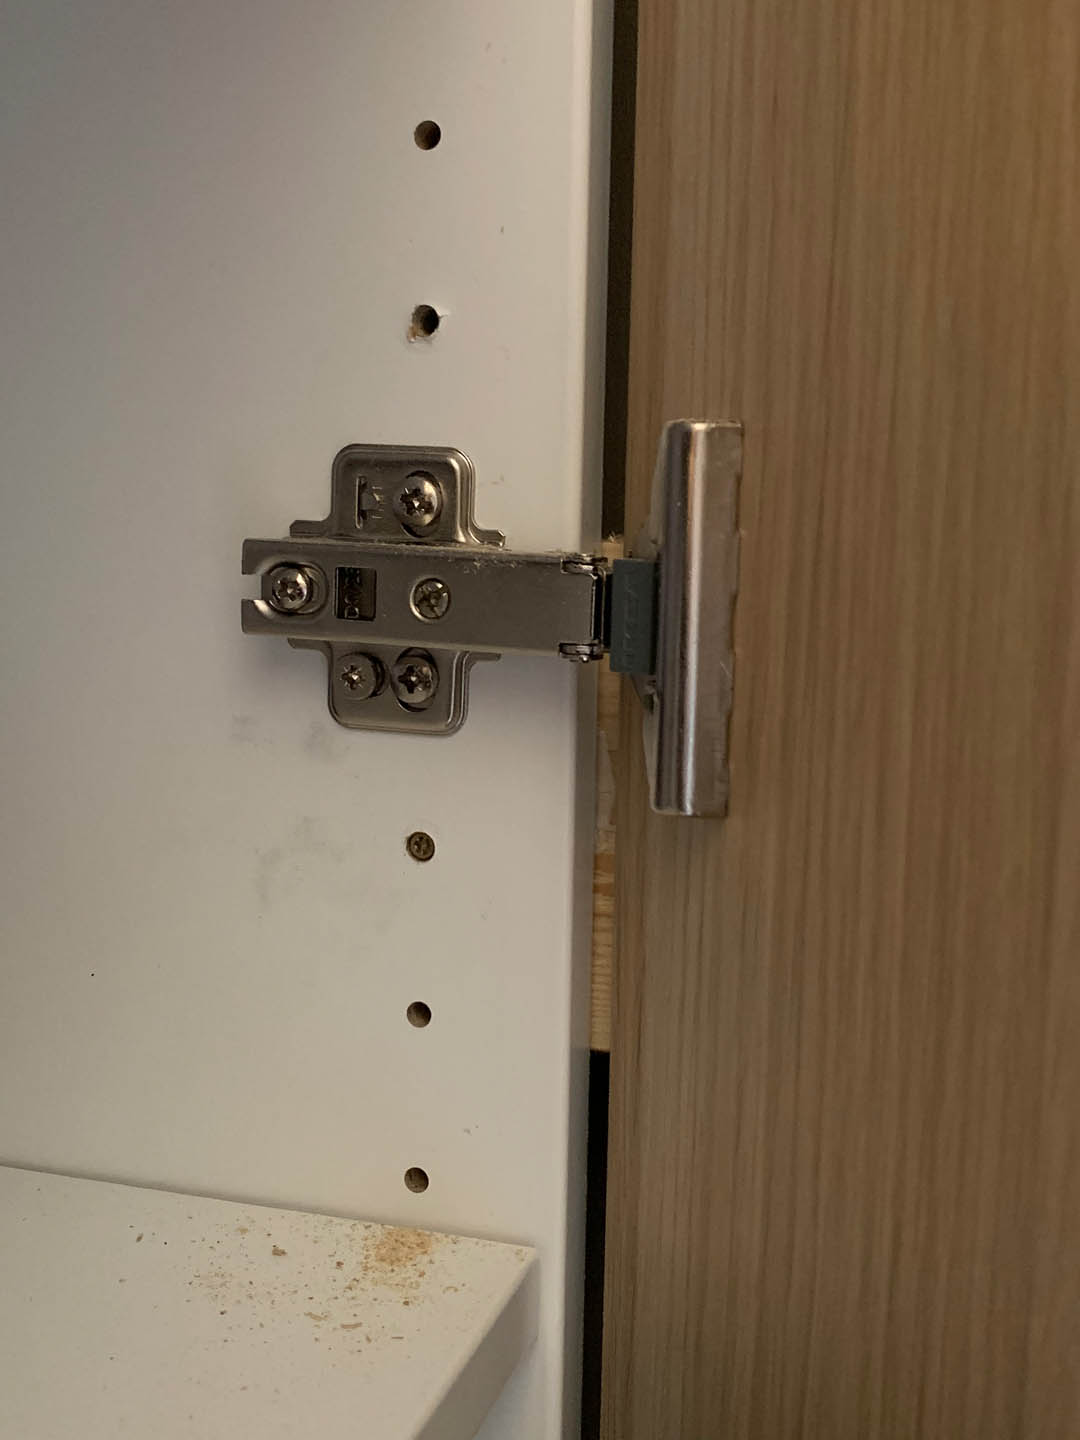
NB Once the strips were fixed, we realized that the doors that would open against the end panels and against each other had to be chamfered otherwise they would rub. They also needed open hinges.
Boxing in wardrobe frames
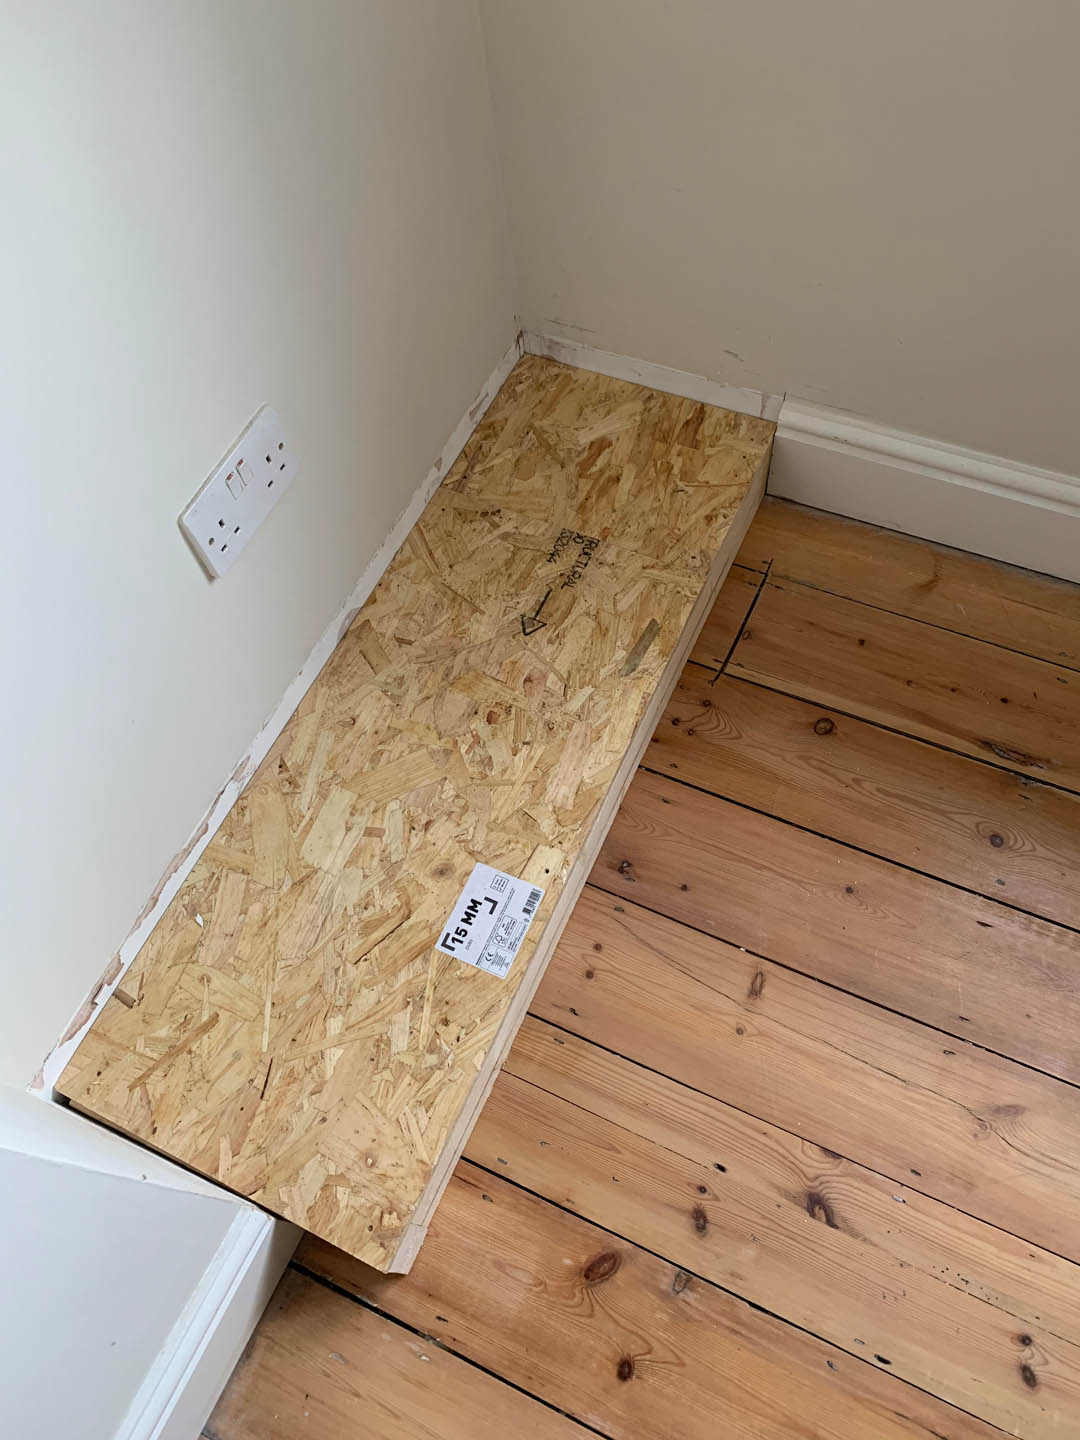
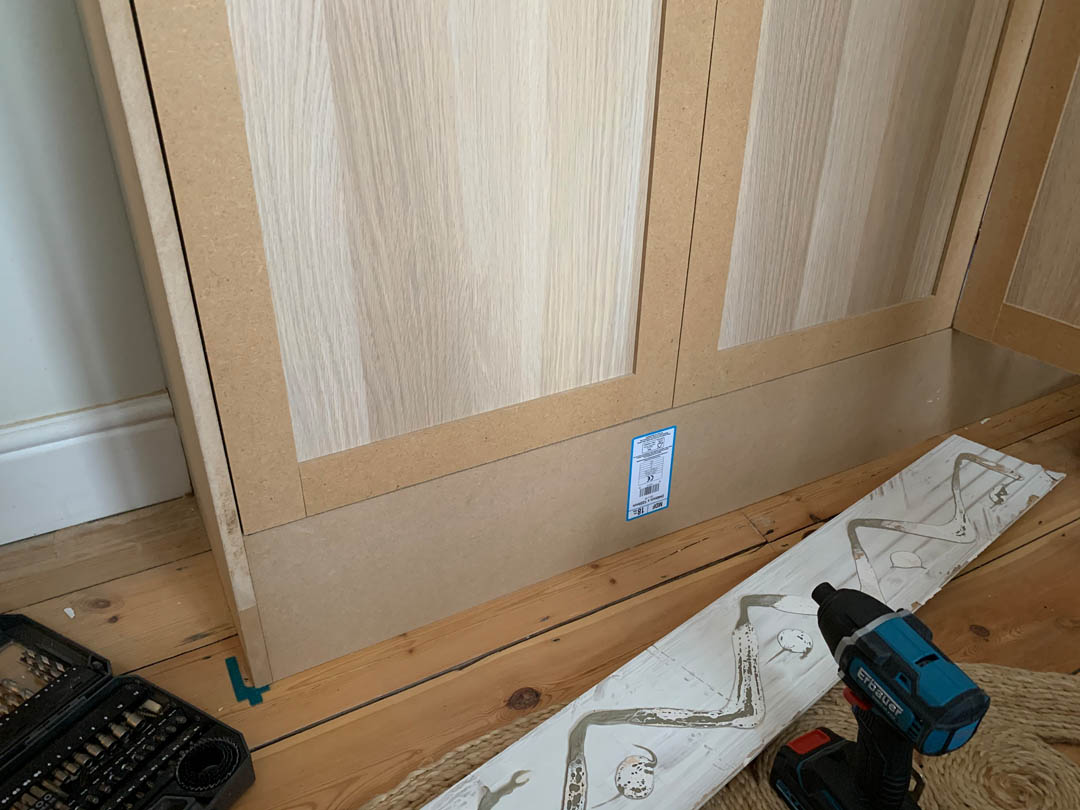
6. Use a chainsaw to cut the end and bottom panels that will dress the cabinets. Make sure they will line up with the doors. Remove any necessary rail or cornice with a multi-tool and glue and screw the end panels directly to the cabinet surface. Glue and screw the bottom panels to the base on which the cabinets rest.
7. To cover the large space on the right side of the left wardrobe, we decided to use wood that we already had. We drilled the inside of the cabinet to attach four blocks of wood. We then drilled a length of lumber into the base and through the ceiling from the attic, securing it to the four wood blocks using glue and more screws.
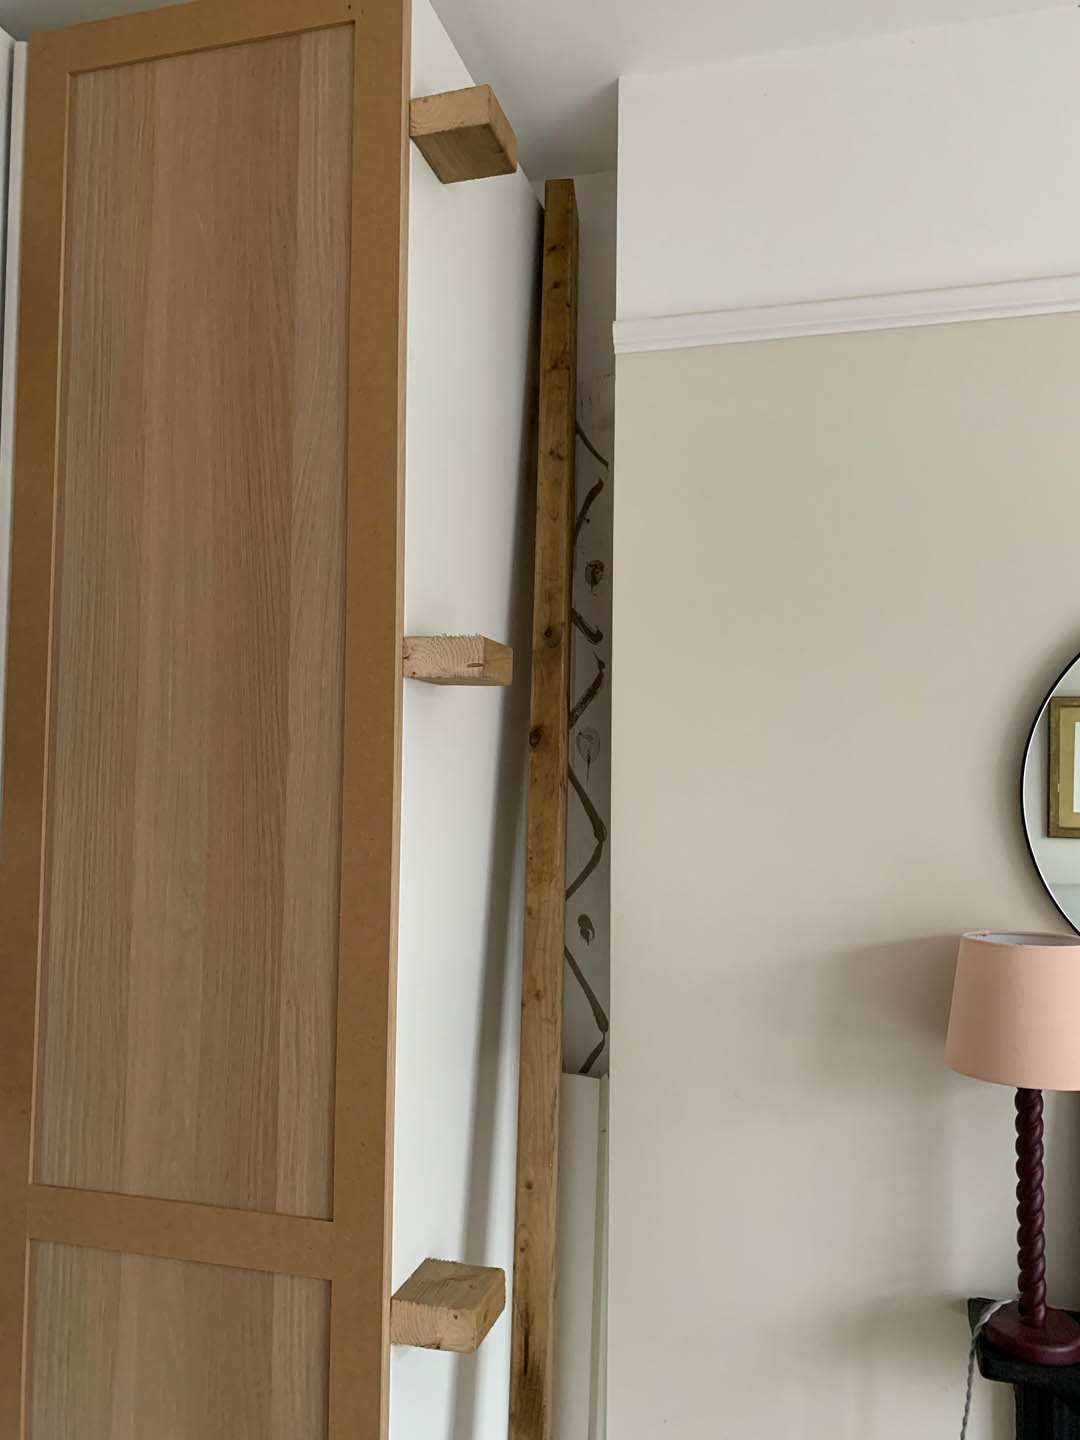
8. We covered the frame with two MDF panels, one on the side, one on the front.
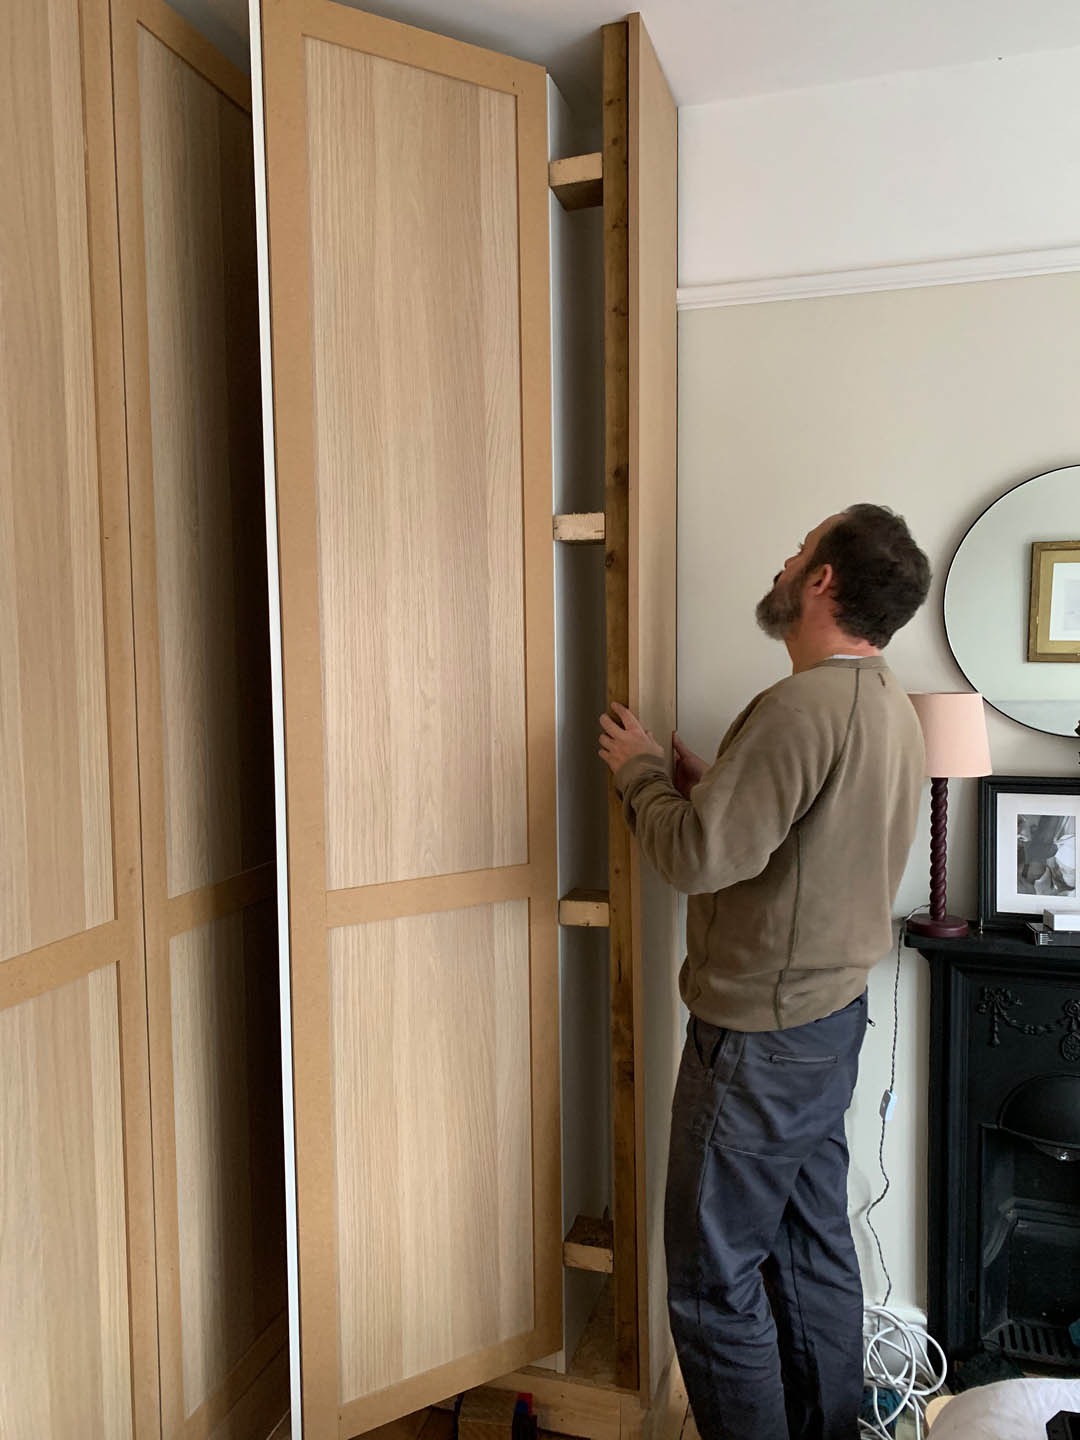
9. We used the same technique for the right panel on the right wardrobe. We drilled the cabinet holes to attach four blocks of wood. We were then able to attach a panel to cover the gap.

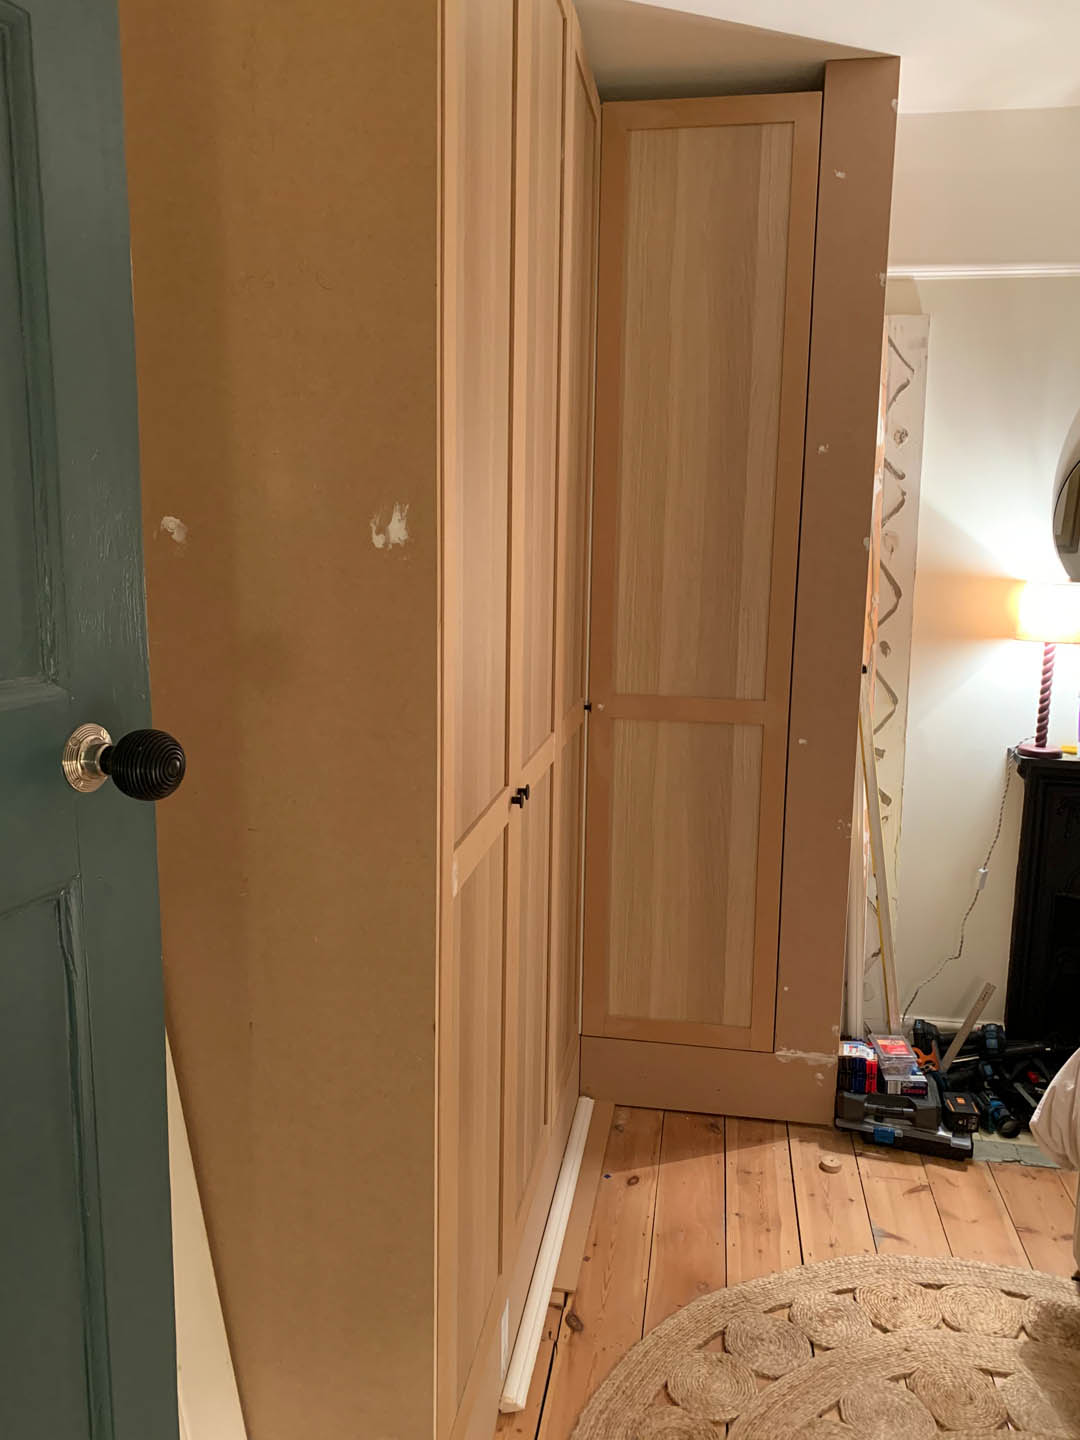
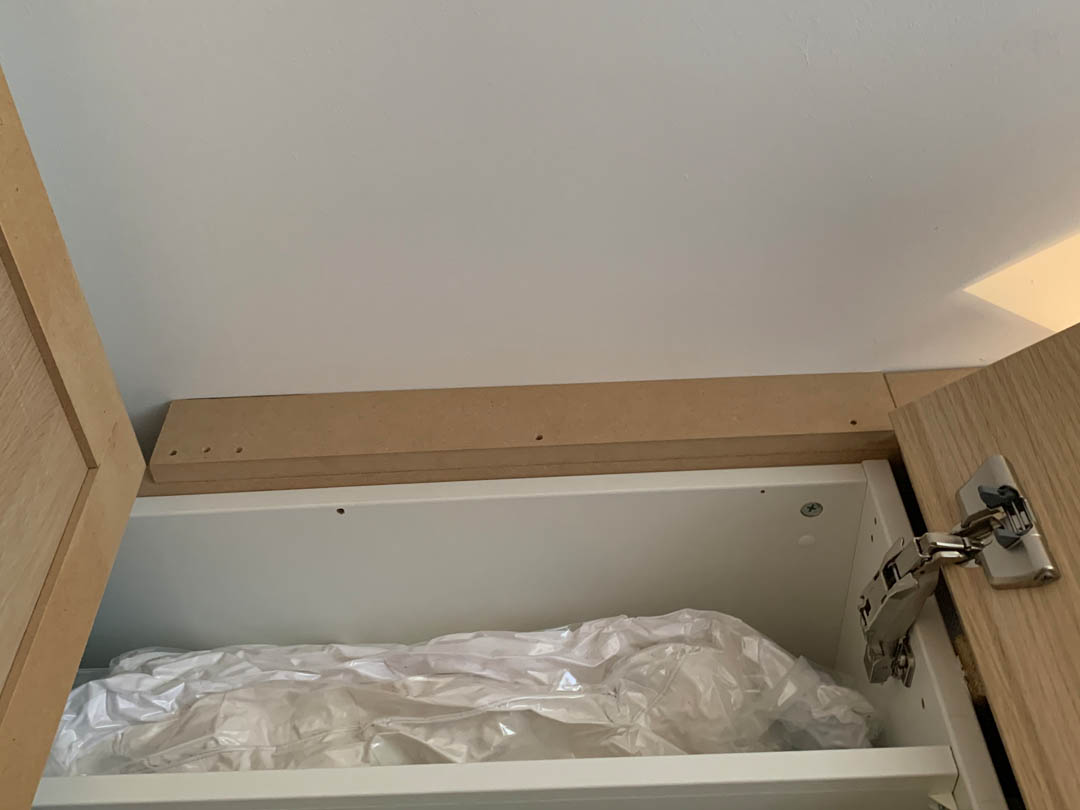
10. The last panels to be attached are the top panels as the measurements of these will depend on the side panels. We drilled the inside of the top of the cabinet to attach a block of wood to the top of the cabinet that is flush with the frame. We could then drill a panel on it to cover the gap between the top of the cabinet and the ceiling.

11. We reattached the plinth to the bottom panel of the cabinets to create the feeling that the cabinets are integrated into the fabric of the room. We had to cut the boards at an angle or trace them to fit together.
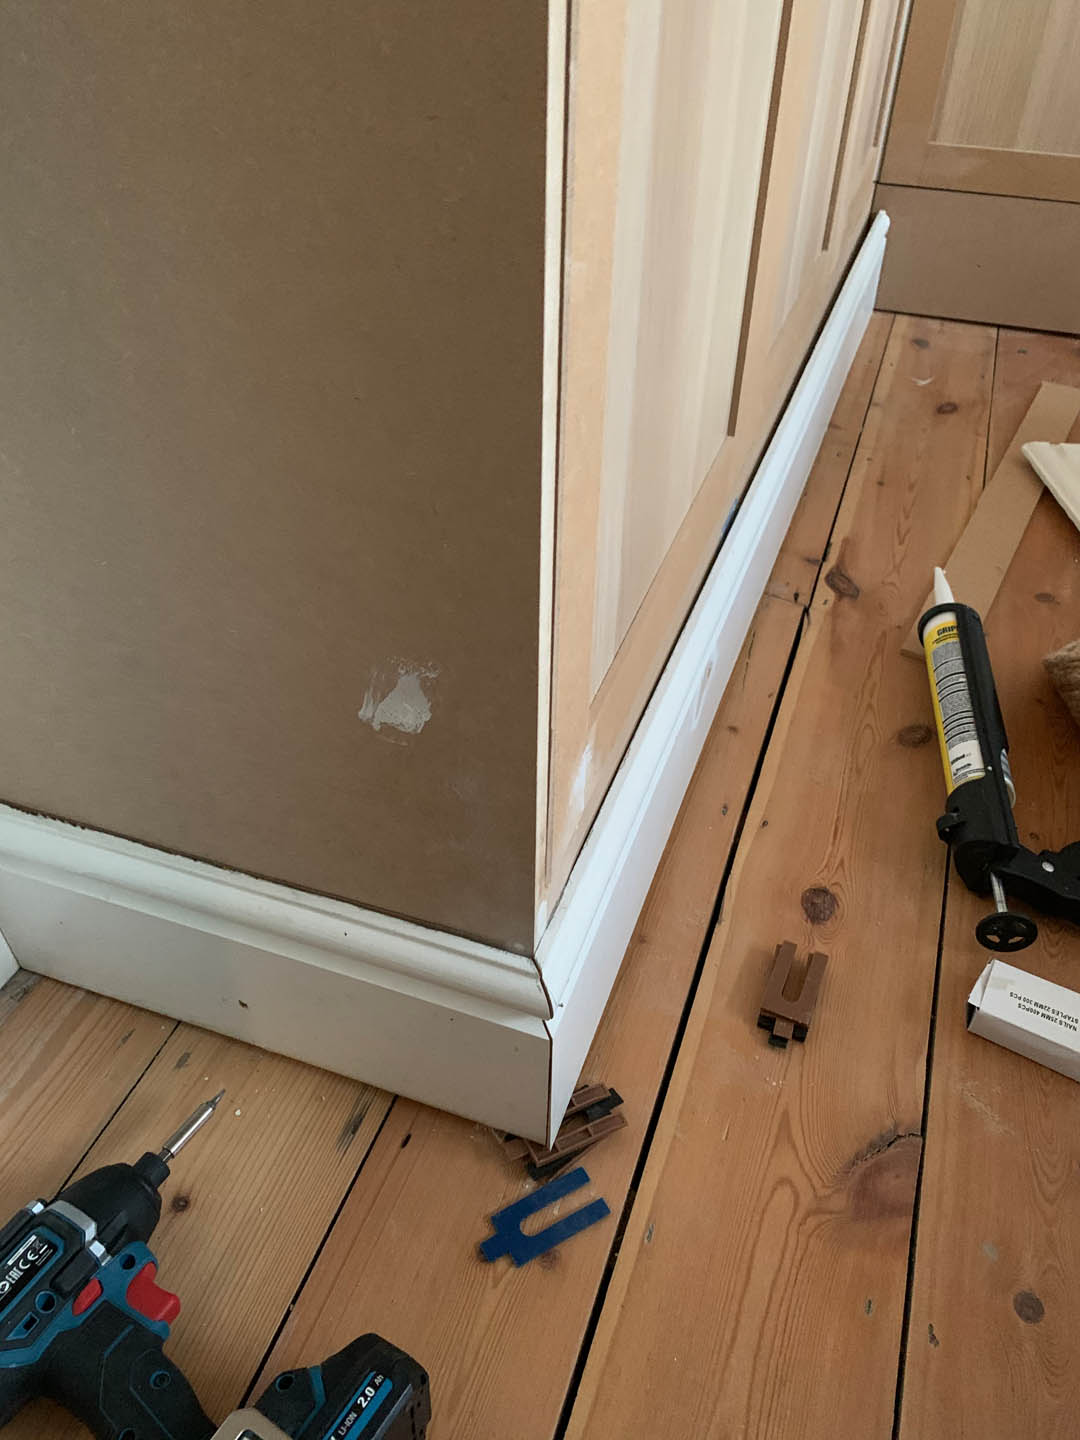
12. We then filled all the holes and gaps with wood putty and sanded.
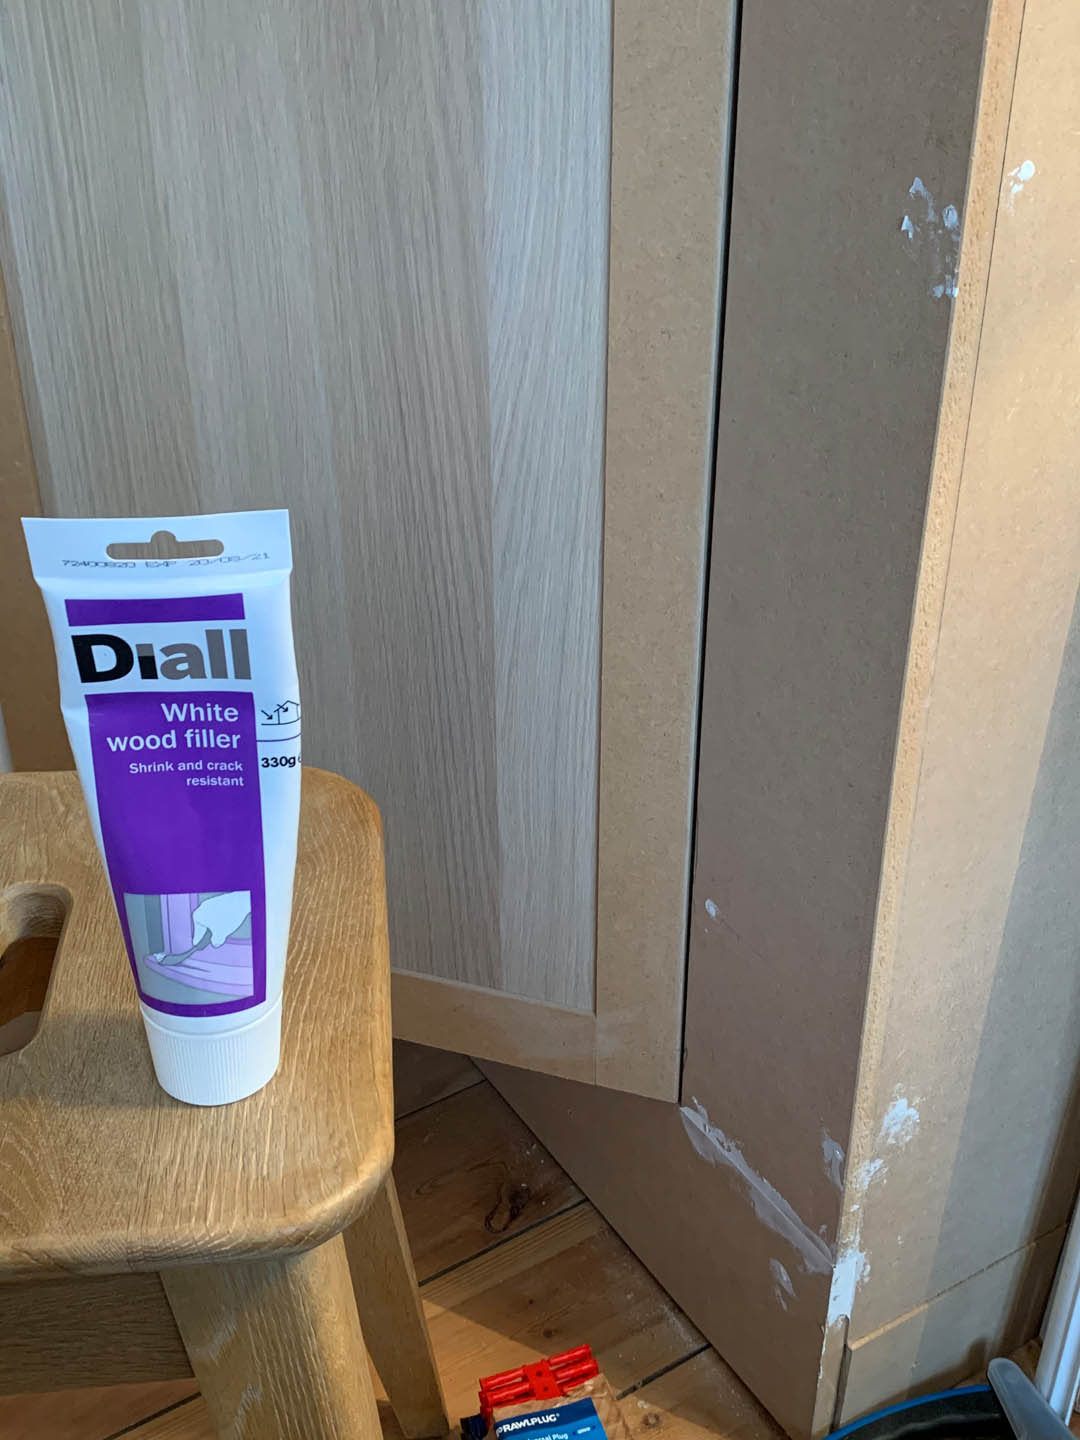
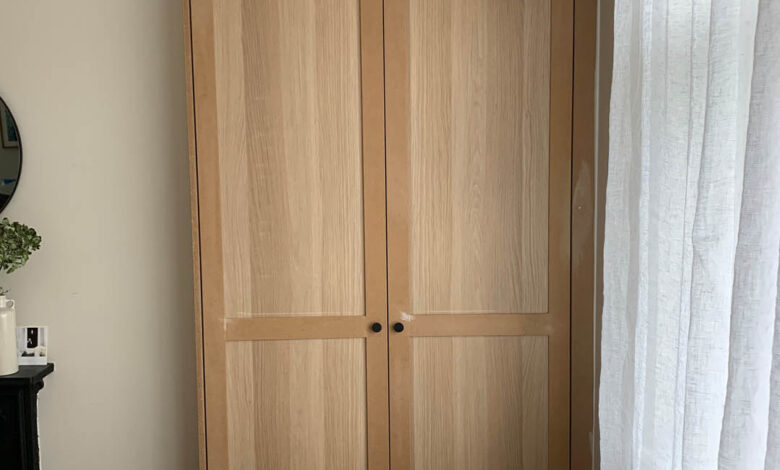
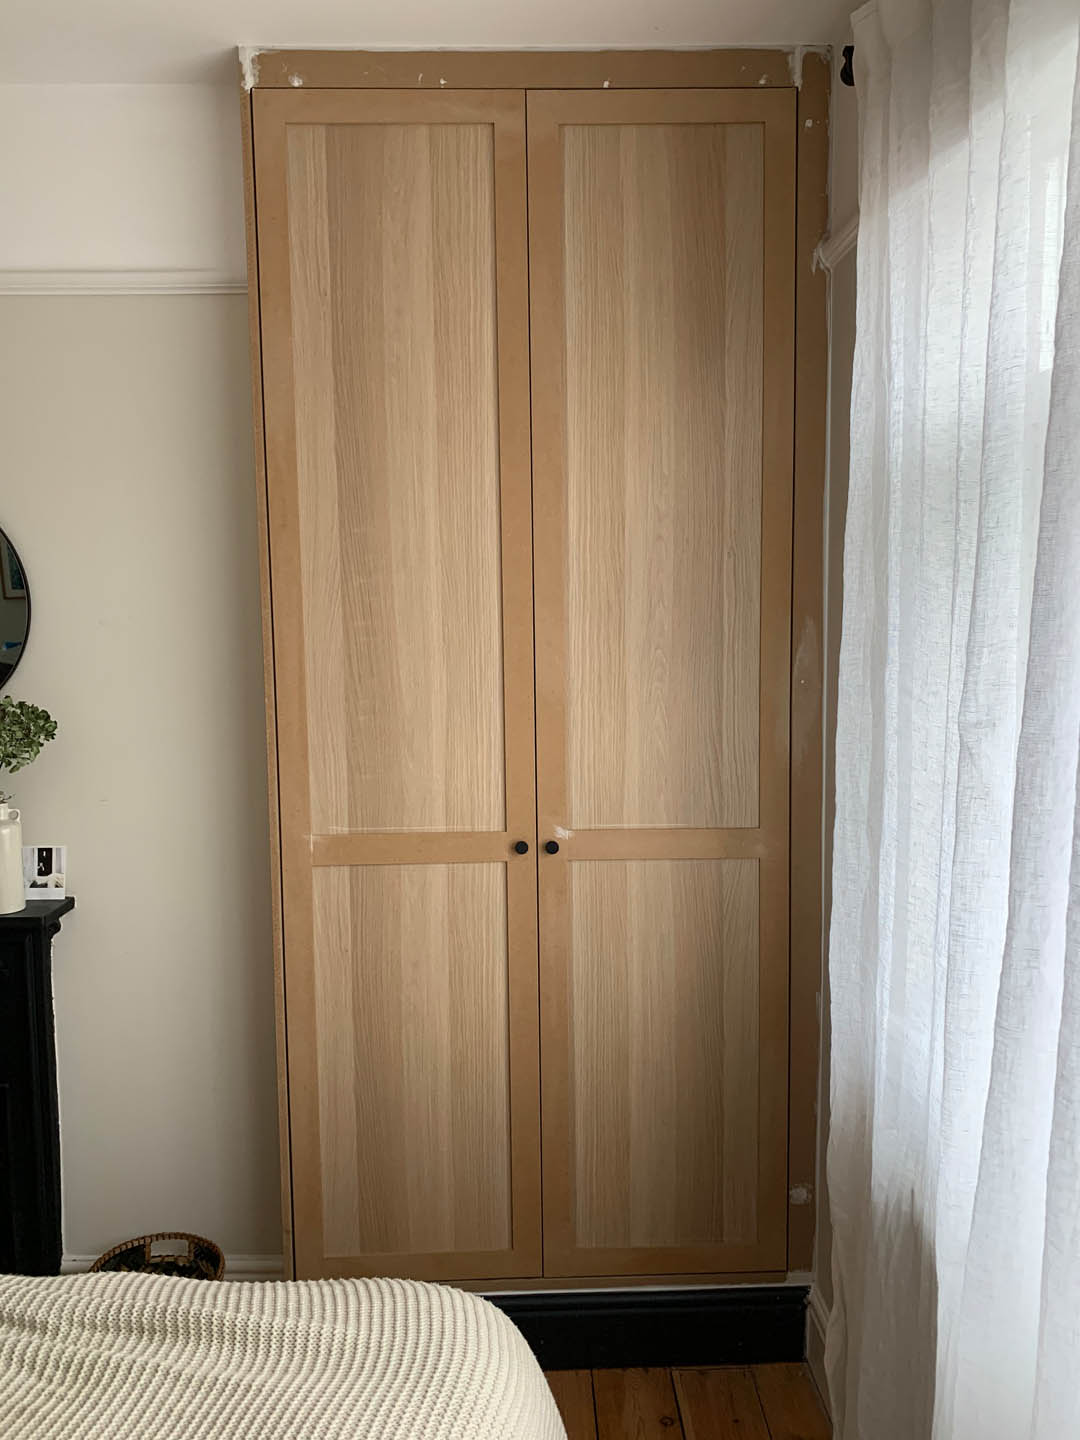
This is what they looked like before they were painted …
I realize that my explanations written here may not be clear to some, so ask me questions in the comments section below and I’ll try to get back to you as soon as possible. Just to let you know the closet doors and boxing are now painted including the interior of the doors but not the interior of the closets (a question that has been asked to me many times before). We did this a while ago now, so little details have escaped me, so feel free to ask very specific questions.
If we had to do it again, we would have waited until the panel doors were in stock, as customizing the smooth fronts was really a problem and they would open more easily now if they didn’t have the MDF strips. However, I am really very happy with their appearance so I really don’t regret it.
I’ll take some pictures of how the cabinets are all painted to show you the next one. Believe it or not, I still haven’t sorted out the entire interior of the cabinets (I blame the locking!), So this may have to wait a bit.
Katy x